Let’s talk about something sweet that’ll make your kitchen smell like heaven – honey donuts! If you’ve ever wondered how to make honey donuts (como hacer rosquillas en miel), you’re in the right place. This isn’t just any recipe; it’s a step-by-step guide that’ll turn your regular weekend baking session into a gourmet experience. So, grab your apron, and let’s dive in!
Honey donuts aren’t just a dessert; they’re a mood booster, a stress reliever, and a way to impress your friends and family. You don’t need to be a professional chef to pull this off. All you need is a little bit of patience, the right ingredients, and this guide. We’ll cover everything from the basics to the fancy stuff, so even if you’re a beginner, you’ll nail it.
Now, I know what you’re thinking – “Can I really make restaurant-quality honey donuts at home?” The answer is a big fat YES! With the right techniques and tips, you’ll be serving up golden, fluffy donuts that’ll have everyone asking for seconds. Let’s get started!
Table of Contents
- Ingredients You’ll Need
- The Basic Method to Make Honey Donuts
- Pro Tips for Perfect Donuts
- Experimenting with Flavors
- Common Issues and How to Fix Them
- Nutritional Information
- A Brief History of Honey Donuts
- Healthier Alternatives
- How to Store Honey Donuts
- Frequently Asked Questions
Ingredients You’ll Need
Alright, let’s talk about the goodies you’ll need to whip up these honey donuts. Don’t worry, most of these ingredients are probably already in your pantry. Here’s what you’ll need:
For the Dough:
- 2 1/4 cups all-purpose flour
- 1 packet (2 1/4 teaspoons) active dry yeast
- 1/2 cup warm milk (around 110°F or 45°C)
- 1/4 cup granulated sugar
- 1 large egg, lightly beaten
- 1/4 cup unsalted butter, melted
- 1 teaspoon salt
- 1 teaspoon vanilla extract
For the Honey Glaze:
- 1 cup powdered sugar
- 2-3 tablespoons honey
- 2-3 tablespoons warm water
- A pinch of salt
And there you have it! Simple, right? Now, let’s move on to the fun part – making them!
The Basic Method to Make Honey Donuts
This is where the magic happens. Follow these steps carefully, and you’ll be golden:
- In a large mixing bowl, dissolve the yeast in warm milk. Let it sit for about 5-10 minutes until it becomes frothy.
- Add the sugar, egg, melted butter, salt, and vanilla extract to the yeast mixture. Stir until well combined.
- Gradually add the flour to the wet ingredients, mixing until a soft dough forms. You might need to knead it for a few minutes to get the right texture.
- Cover the dough with a clean kitchen towel and let it rise in a warm, draft-free area for about an hour, or until it doubles in size.
- Once the dough has risen, punch it down and roll it out on a floured surface to about 1/2 inch thickness.
- Cut the dough into donut shapes using a donut cutter or a glass and a smaller round cutter for the hole.
- Place the donuts on a baking sheet lined with parchment paper, cover them, and let them rise for another 15-20 minutes.
- Heat oil in a deep fryer or a large pot to 350°F (175°C). Fry the donuts in batches until golden brown, flipping them halfway through.
- Drain the donuts on paper towels and let them cool slightly before dipping them in the honey glaze.
And voila! You’ve got yourself some delicious honey donuts. But wait, there’s more!
Pro Tips for Perfect Donuts
Here are a few insider tips to take your honey donuts to the next level:
- Temperature matters: Make sure your milk and water are at the right temperature. Too hot, and you’ll kill the yeast; too cold, and it won’t activate.
- Don’t overmix: Overmixing the dough can make your donuts tough. Mix until it comes together, then stop.
- Let them rest: Both rising stages are crucial. Don’t rush the process; patience is key here.
- Oil depth: When frying, make sure the oil is deep enough to fully submerge the donuts. This ensures even cooking.
- Glaze while warm: Dip the donuts in the glaze while they’re still slightly warm for better adhesion.
These tips might seem small, but they make a huge difference in the final product. Trust me, your taste buds will thank you!
Experimenting with Flavors
Once you’ve mastered the basic recipe, why not get creative? Here are some flavor ideas to spice things up:
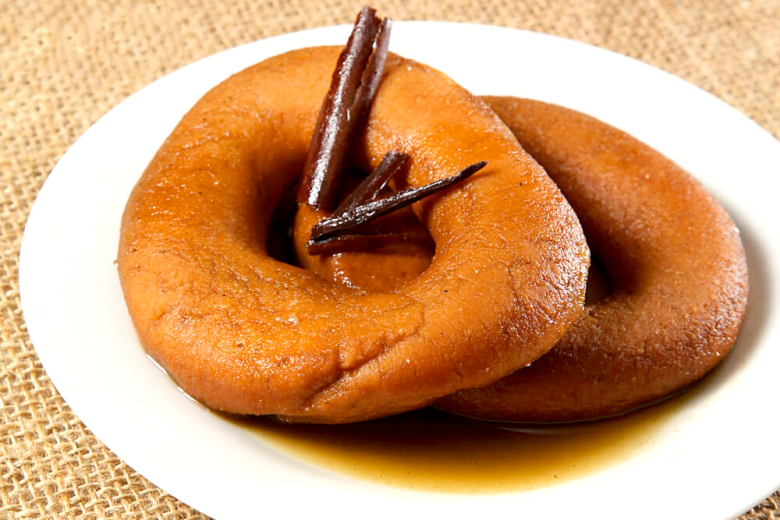
Spiced Honey Donuts:
- Add a teaspoon of cinnamon or nutmeg to the dough for a warm, spicy kick.
Chocolate Honey Donuts:
- Drizzle melted chocolate over the honey glaze for a rich, indulgent treat.
Citrus Honey Donuts:
- Swap the vanilla extract for lemon or orange zest for a refreshing twist.
Feel free to experiment with different extracts, spices, and toppings. The possibilities are endless!
Common Issues and How to Fix Them
Even the best bakers run into problems sometimes. Here are some common issues and how to solve them:
- Donuts are too dense: This usually happens when the dough hasn’t risen enough. Make sure you’re giving it enough time to rise properly.
- Glaze is too thick: Add a little more water or honey to thin it out. You want it to be thick enough to coat the donuts but thin enough to drizzle.
- Oil is smoking: Your oil is too hot. Lower the temperature and let it cool down a bit before frying.
- Donuts are greasy: This means they’re not frying long enough. Increase the frying time slightly to allow the excess oil to cook off.
Now that we’ve covered the basics and the troubleshooting, let’s talk about something fascinating – the history of honey donuts!
A Brief History of Honey Donuts
Believe it or not, honey donuts have been around for centuries. The concept of sweetened fried dough dates back to ancient times, with different cultures putting their own spin on it. Honey has been used as a natural sweetener for thousands of years, and combining it with fried dough was a no-brainer for our ancestors.
In medieval Europe, honey-glazed pastries were a delicacy reserved for the wealthy. As sugar became more widely available, honey took a backseat for a while. But in recent years, there’s been a resurgence of interest in using honey as a natural sweetener, and honey donuts have become a favorite among food enthusiasts.
Isn’t it amazing how something so simple has such a rich history? Now, let’s talk about making them healthier!
Healthier Alternatives
If you’re looking to make your honey donuts a bit healthier, here are a few substitutions you can try:
- Whole wheat flour: Swap out some of the all-purpose flour for whole wheat flour for added fiber.
- Coconut oil: Use coconut oil instead of butter for a healthier fat option.
- Apple sauce: Replace some of the butter with unsweetened apple sauce to reduce fat content.
- Baking: Instead of frying, try baking the donuts for a lower-calorie option.
These changes won’t compromise the taste too much, and they’ll make your donuts a bit healthier. Win-win!
How to Store Honey Donuts
So, you’ve made a batch of honey donuts, but you can’t eat them all at once. How do you store them? Here are some tips:
- At room temperature: Store them in an airtight container for up to 2 days.
- In the fridge: They’ll last for up to 5 days if stored in the refrigerator.
- In the freezer: For longer storage, wrap them individually in plastic wrap and place them in a freezer-safe bag. They’ll keep for up to 2 months.
When reheating, pop them in the microwave for a few seconds or toast them in the oven for a fresh-from-the-fryer taste.
Frequently Asked Questions
Here are some common questions about making honey donuts:
- Can I use a donut pan instead of frying? Absolutely! A donut pan will give you baked donuts with a similar shape and texture.
- What if I don’t have honey? You can substitute honey with maple syrup or agave nectar for a similar flavor profile.
- Can I make the dough ahead of time? Yes, you can prepare the dough the night before and let it rise in the fridge overnight.
- How do I know when the donuts are done frying? They should be golden brown and float to the surface when ready.
And there you have it – everything you need to know about making honey donuts at home. Now, it’s your turn to give it a shot!
Kesimpulan
So, there you have it – a comprehensive guide on how to make honey donuts (como hacer rosquillas en miel) like a pro. From the basic recipe to pro tips and flavor ideas, we’ve covered it all. Remember, practice makes perfect, so don’t be discouraged if your first batch isn’t flawless. Keep experimenting, and you’ll soon be churning out honey donuts that’ll have everyone asking for the recipe.
Now, here’s the fun part – take action! Try out the recipe, share your results with us in the comments, and let us know how it turned out. And if you loved this article, don’t forget to share it with your friends and family. Happy baking, and until next time – keep those donuts coming!