So you’ve noticed that your bathtub faucet handle is acting up lately, huh? Maybe it’s leaking, feels loose, or just won’t cooperate when you try to turn it. Whatever the issue, don’t panic—because fixing a bathtub faucet handle isn’t as scary as it sounds. In fact, with the right tools and a bit of know-how, you can tackle this project yourself without calling in the plumber. And guess what? You’ll save a ton of cash while learning a valuable skill!
Now, before we dive into the nitty-gritty, let’s talk about why knowing how to repair bathtub faucet handles matters. Whether you’re dealing with an old house or simply want to keep your bathroom in tip-top shape, maintaining your plumbing fixtures is crucial. A faulty handle doesn’t just ruin your morning shower—it could lead to bigger problems down the line. Think water damage, wasted resources, or even mold growth if left unchecked.
But here’s the good news: this guide is packed with step-by-step instructions, insider tips, and practical advice to help you master the art of bathtub faucet repair. So grab your toolkit, roll up those sleeves, and let’s get started!
Table of Contents
- Understanding Bathtub Faucet Handles
- Tools You’ll Need for the Job
- Common Problems with Bathtub Faucet Handles
- How to Diagnose the Issue
- Step-by-Step Guide to Repairing Your Bathtub Faucet Handle
- Preventive Maintenance Tips
- Cost-Saving Benefits of DIY Repairs
- Frequently Asked Questions
- Troubleshooting Common Issues
- Wrapping It Up
Understanding Bathtub Faucet Handles
What Makes a Bathtub Faucet Handle Tick?
Before you can fix something, it helps to understand how it works. A bathtub faucet handle is more than just a decorative piece on your wall—it’s an essential component of your plumbing system. Its primary job? To control the flow of water and temperature by interacting with the valve inside the wall. And trust me, when it’s working properly, life feels a whole lot easier.
But what happens when things go wrong? Well, that’s where our trusty guide comes in. By breaking down the anatomy of a bathtub faucet handle, you’ll gain a deeper understanding of its inner workings—and why certain issues crop up in the first place.
Here’s a quick rundown of the key parts:
- Handle: The part you actually grip and turn.
- Stem: The rod that connects the handle to the valve.
- Cartridge: A small but mighty component that regulates water flow and temperature.
- O-Ring: A rubber seal that prevents leaks.
- Set Screw: A tiny screw that keeps the handle securely in place.
Tools You’ll Need for the Job
Don’t Forget These Essential Items
Alright, so now that you know what you’re dealing with, let’s talk about the tools you’ll need to get the job done. Here’s the thing: you don’t need a garage full of fancy gadgets to repair a bathtub faucet handle. In fact, most DIYers probably already have these items lying around the house.
Here’s a checklist of everything you’ll need:
- Flathead and Phillips screwdrivers
- Adjustable wrench
- Needle-nose pliers
- Replacement parts (if necessary)
- Penetrating oil (like WD-40)
- Teflon tape
And remember, preparation is key. Make sure you have all your tools ready and within reach before you start the repair process. Oh, and don’t forget to turn off the water supply first—that’s a rookie mistake you definitely want to avoid!
Common Problems with Bathtub Faucet Handles
Identifying the Culprit Behind Your Leaky Handle
Not all bathtub faucet handle issues are created equal. Some problems are minor annoyances, while others require a bit more elbow grease to fix. Let’s break down the most common culprits:
- Leaking Handle: This is usually caused by a worn-out O-ring or cartridge. Replacing these parts should do the trick.
- Loose Handle: If your handle feels wobbly, chances are the set screw has come loose. Tightening it should solve the issue.
- Stuck Handle: Rust or mineral buildup can make turning the handle a real chore. A little penetrating oil and some patience will usually get things moving again.
- Water Won’t Shut Off: This one’s a bit trickier, but it often points to a damaged cartridge or valve seat. Replacing the faulty part should restore normal function.
Now that you know what to look for, let’s move on to the next step: diagnosing the problem.
How to Diagnose the Issue
Putting on Your Detective Hat
Diagnosing a bathtub faucet handle issue isn’t rocket science, but it does require a bit of detective work. Here’s how to approach it:
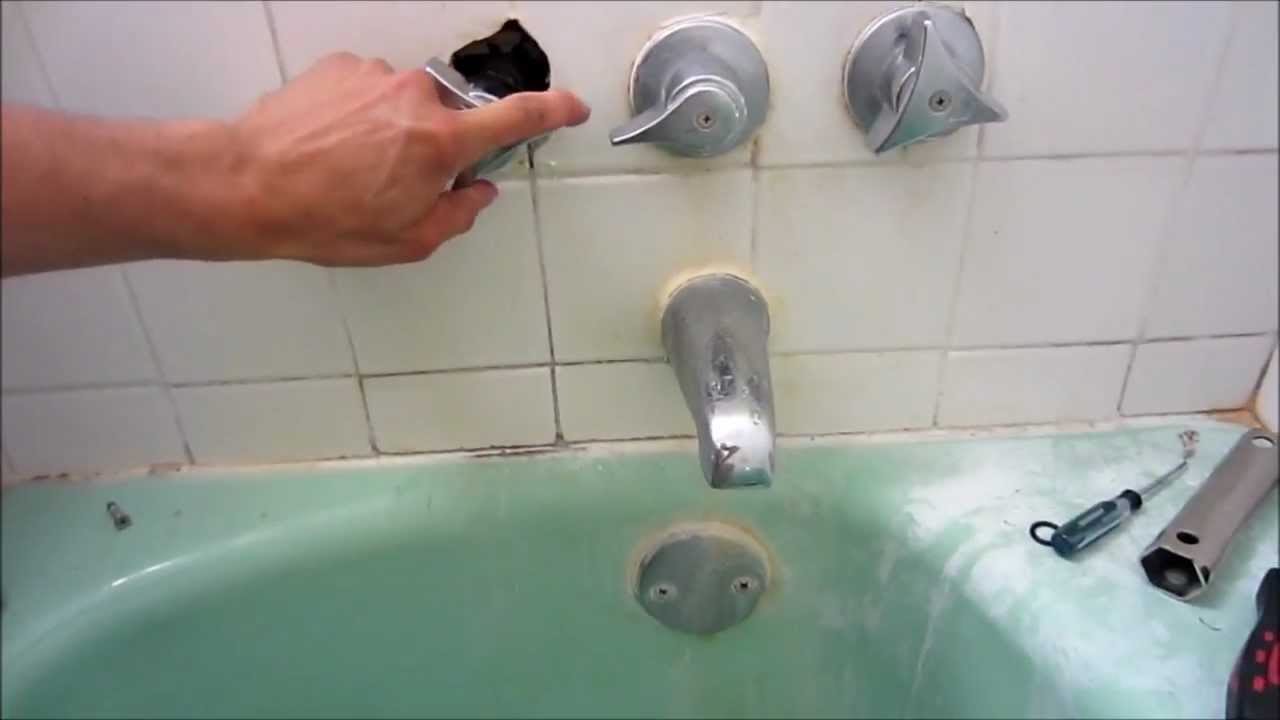
Step 1: Turn off the water supply to the bathtub. You don’t want to be dealing with a surprise geyser while you’re trying to fix things.
Step 2: Inspect the handle for visible signs of damage, like cracks or corrosion. If it looks like it’s seen better days, replacement might be your best bet.
Step 3: Check the O-ring and cartridge for wear and tear. These are the usual suspects when it comes to leaks and other issues.
Step 4: Test the handle’s movement. Does it feel smooth and responsive, or is it stiff and uncooperative? Your findings will guide you toward the right solution.
Step-by-Step Guide to Repairing Your Bathtub Faucet Handle
Let’s Get Our Hands Dirty
Ready to dive in? Follow these steps to repair your bathtub faucet handle like a pro:
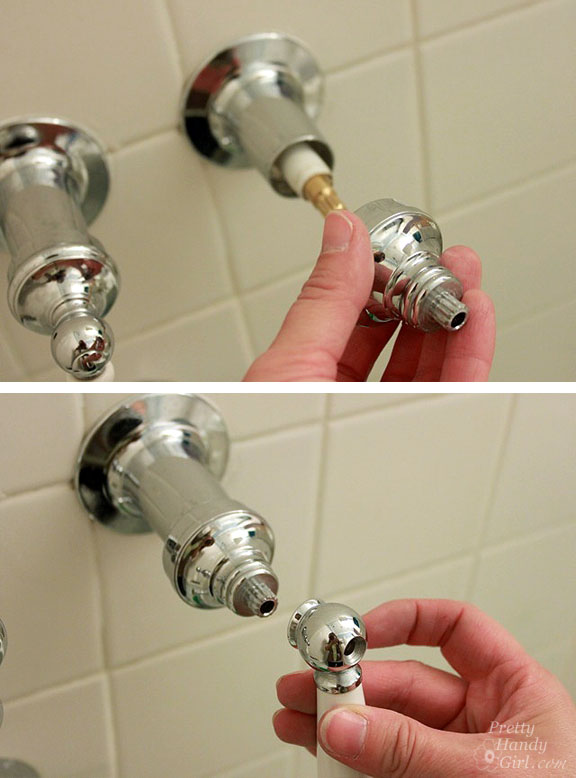
Step 1: Remove the handle by unscrewing the set screw. Use a small Allen wrench if needed.
Step 2: Pull the handle off gently. If it’s stuck, apply some penetrating oil and let it sit for a few minutes.
Step 3: Inspect the stem and cartridge. Replace any damaged or worn-out parts.
Step 4: Reassemble the handle, making sure everything is securely tightened.
Step 5: Turn the water supply back on and test the handle. Voilà! Problem solved.
Preventive Maintenance Tips
Keep Your Handle Happy and Healthy
Fixing a bathtub faucet handle is one thing, but preventing future issues is another. Here are a few tips to keep your handle in top condition:
- Clean the handle regularly to prevent mineral buildup.
- Inspect the O-ring and cartridge every six months for signs of wear.
- Use Teflon tape on threaded connections to ensure a tight seal.
- Replace worn-out parts promptly to avoid bigger problems down the road.
Cost-Saving Benefits of DIY Repairs
Why Bother Fixing It Yourself?
Let’s face it—calling a plumber isn’t exactly cheap. By learning how to repair your bathtub faucet handle yourself, you’ll not only save money but also gain a sense of accomplishment. Plus, the skills you develop can be applied to other home improvement projects. It’s a win-win situation!
Frequently Asked Questions
Got Questions? We’ve Got Answers
Q: Can I fix a bathtub faucet handle without replacing any parts?
A: In some cases, yes! Tightening the set screw or applying penetrating oil can resolve minor issues. However, if the handle is leaking or damaged, replacement parts may be necessary.
Q: How long does a typical repair take?
A: Most repairs can be completed in under an hour, depending on the complexity of the issue.
Troubleshooting Common Issues
What to Do When Things Go Wrong
Even the best-laid plans can hit a snag. If you encounter any unexpected issues during your repair, don’t panic. Here are a few troubleshooting tips:
- If the new parts don’t fit, double-check the model number of your faucet to ensure compatibility.
- Still leaking after replacement? Check for cross-threading or improper installation.
- Handle still feels loose? Tighten the set screw a bit more, but be careful not to overtighten.
Wrapping It Up
So there you have it—a comprehensive guide to repairing your bathtub faucet handle. From understanding the basics to tackling common issues, we’ve covered everything you need to know to get the job done right. Remember, practice makes perfect, so don’t be discouraged if your first attempt isn’t flawless.
And hey, if you found this guide helpful, why not share it with a friend? Or better yet, leave a comment below and let us know how your repair went. Who knows—you might inspire someone else to take on their own DIY project!
Until next time, stay handy and keep those handles in check!