So, you've heard about using caps to highlight hair, but you're not sure where to start? Don't worry, we've got your back. Highlighting hair with a cap is a game-changer for achieving stunning, salon-quality results at home. Whether you're a DIY enthusiast or just want to save some cash, this method is a must-know for any hair enthusiast.
Imagine walking into a room and turning heads with your perfectly highlighted locks. It’s not just about the color, it’s about the confidence boost you get from knowing your hair looks on point. Using a cap might sound intimidating, but trust us, once you get the hang of it, you’ll wonder why you didn’t try it sooner.
This guide will take you through everything you need to know about using a cap to highlight hair. From the tools you’ll need to the step-by-step process, we’ve got all the tips and tricks to make your highlighting journey a breeze. So, let's dive in and turn your hair into a masterpiece!
Table of Contents:
- What is a Highlighting Cap?
- Benefits of Using a Highlighting Cap
- Tools You'll Need
- Step-by-Step Guide
- Common Mistakes to Avoid
- Tips for Best Results
- Variations of Highlighting Caps
- FAQ
- Expert Recommendations
- Conclusion
What is a Highlighting Cap?
A highlighting cap is like the secret weapon of hairstylists worldwide. It's a stretchy cap with tiny holes that you can use to section off specific strands of hair for highlighting. Think of it as a DIY salon tool that lets you control exactly which parts of your hair get the color treatment. This method is perfect for achieving precise, natural-looking highlights without the hefty salon price tag.
Now, here's the cool part: the cap method allows you to focus on specific areas of your hair, giving you that salon-finish look without the fuss. You can create a range of styles, from subtle sun-kissed highlights to bold, eye-catching streaks. And the best part? It's super easy to use once you get the hang of it.
Why Choose a Highlighting Cap?
Using a cap for highlighting is all about control and precision. Unlike other methods, the cap lets you pick and choose which strands to highlight, ensuring an even distribution of color. Plus, it's a great option if you're looking to avoid damage, as it minimizes the amount of bleach or dye that comes into contact with your scalp.
Benefits of Using a Highlighting Cap
Let's talk about the perks of using a cap for highlighting. First off, it's budget-friendly. Salon-quality highlights can cost a pretty penny, but with a cap, you can achieve the same results from the comfort of your own home. Second, it's super versatile. Whether you're going for a natural look or something more dramatic, the cap has got you covered.
And let's not forget about the convenience factor. No need to book an appointment or wait in line at the salon. Just grab your cap, your dye, and get to work. Plus, it's a great way to experiment with different colors and styles without committing to a full head of color.
Convenience and Control
The cap gives you ultimate control over your highlights. You can choose which strands to highlight, how much color to apply, and even how long to leave the dye in. This level of control ensures that you get the exact look you want, without any unwanted surprises.
Tools You'll Need
Before you dive into the world of highlighting caps, make sure you have all the necessary tools. Here's a quick rundown of what you'll need:
- Highlighting Cap: The star of the show, obviously.
- Color Developer: This helps activate the dye and ensures it penetrates your hair.
- Color Mix Bowl: A must-have for mixing your dye and developer.
- Brush: For applying the dye evenly to your strands.
- Gloves: To protect your hands from stains and chemicals.
- Towel: To catch any drips or spills.
Having all these tools on hand will make your highlighting process smoother and more efficient. Trust us, you don't want to be running around trying to find a brush while your dye is setting!
Essential Tools Checklist
Make sure you double-check your tools list before you start. Nothing's worse than realizing halfway through that you're missing something crucial. And hey, if you're new to this whole highlighting thing, don't worry. Most kits come with everything you need, so you can just grab and go.
Step-by-Step Guide
Now that you've got all your tools ready, let's walk through the step-by-step process of using a cap to highlight hair.
Step 1: Prep Your Hair
Start by washing and drying your hair. Clean hair ensures that the dye adheres properly. Once your hair is dry, comb it out to remove any tangles. This will make threading the cap much easier.
Step 2: Put on the Cap
Stretch the cap over your head, making sure it fits snugly. You want it to be tight enough to stay in place, but not so tight that it's uncomfortable. Once it's on, smooth out any wrinkles or bunches.
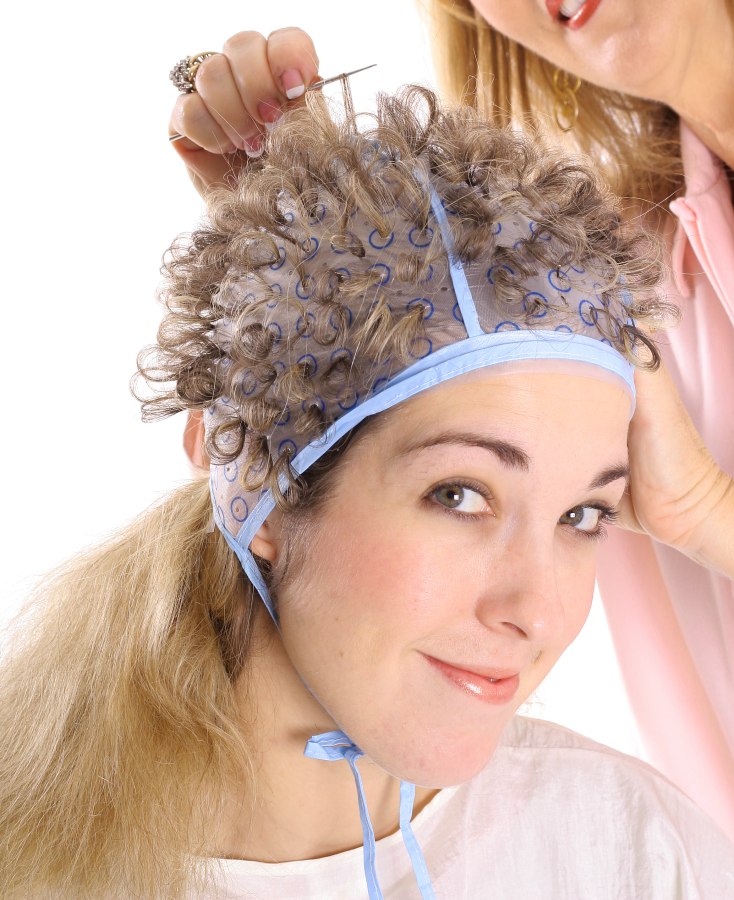
Step 3: Thread Your Strands
Using a hook or your fingers, start threading strands of hair through the holes in the cap. Focus on the areas you want to highlight, and try to keep the strands evenly spaced. This will give you a more natural look.
Step 4: Mix Your Dye
In your mixing bowl, combine your dye and developer according to the instructions on the package. Make sure it's thoroughly mixed before moving on to the next step.
Step 5: Apply the Dye
Using your brush, apply the dye to the strands you've threaded through the cap. Be generous, but not too generous. You want to make sure each strand is fully coated, but you don't want it dripping everywhere.
Step 6: Let It Set
Once you've applied the dye, let it sit for the recommended time. This can vary depending on the brand and the color you're using, so check the instructions carefully. While it's setting, relax and enjoy the fact that you're saving yourself a trip to the salon.
Step 7: Rinse and Style
After the dye has set, carefully remove the cap and rinse your hair thoroughly. Use a good quality shampoo and conditioner to wash out any excess dye and leave your hair feeling soft and shiny. Once it's clean, style it however you like and show off your new highlights!
Common Mistakes to Avoid
Even the pros make mistakes sometimes, so don't feel bad if things don't go perfectly the first time. Here are a few common mistakes to watch out for:
- Not Threading Enough Strands: Make sure you're threading enough strands to achieve the look you want. Too few strands can make your highlights look patchy.
- Leaving the Dye on Too Long: Overprocessing can lead to brassy or uneven results. Stick to the recommended time.
- Not Protecting Your Clothes: Dye stains can be a nightmare, so make sure you're wearing old clothes or an apron while you work.
By avoiding these common pitfalls, you'll be well on your way to achieving salon-quality highlights at home.
Learning from Mistakes
Remember, practice makes perfect. The more you use a cap, the better you'll get at it. Don't be discouraged if your first attempt isn't perfect. Every mistake is a learning opportunity, and soon you'll be highlighting like a pro!
Tips for Best Results
Here are a few tips to help you get the best results possible:
- Start with a Small Section: If you're new to using a cap, start with a small section of hair. This will help you get a feel for the process without committing to a full head of highlights.
- Use High-Quality Products: Cheap dye can lead to poor results, so invest in quality products if you can.
- Moisturize Afterward: Highlighting can dry out your hair, so make sure to use a good moisturizing treatment afterward.
These tips will help you achieve the best possible results and keep your hair healthy and shiny.
Moisturizing After Highlights
Highlighting can be tough on your hair, so it's important to take care of it afterward. Use a deep conditioning treatment to keep your hair hydrated and prevent it from becoming brittle. Your hair will thank you!
Variations of Highlighting Caps
Not all highlighting caps are created equal. Some have larger holes for bigger highlights, while others have smaller holes for more precise results. There are also caps made from different materials, each with its own pros and cons. Do some research to find the cap that best suits your needs.
Choosing the Right Cap
When choosing a cap, consider the type of highlights you want to achieve. If you're going for a natural look, a cap with smaller holes might be the way to go. For something more dramatic, a cap with larger holes could be a better choice.
FAQ
Q: Can I use a cap if I have curly hair?
A: Absolutely! The cap method works just as well on curly hair as it does on straight hair. Just make sure to detangle your curls before threading the cap.
Q: How often should I highlight my hair?
A: It depends on your hair type and how quickly your roots grow. As a general rule, you should touch up your highlights every 6-8 weeks.
Expert Recommendations
According to top hairstylists, using a cap is one of the best ways to achieve professional-looking highlights at home. They recommend practicing on a small section first and always using high-quality products. And don't forget to moisturize after highlighting to keep your hair healthy and shiny!
Conclusion
Using a cap to highlight hair is a fantastic way to achieve stunning results without breaking the bank. With the right tools, techniques, and a little practice, you can create salon-quality highlights from the comfort of your own home. So, what are you waiting for? Grab your cap, your dye, and get highlighting!
We hope this guide has given you the confidence and knowledge you need to start your highlighting journey. Remember to share your results with us in the comments, and don't forget to check out our other articles for more hair care tips and tricks. Happy highlighting!