So, you're here because you want to learn how to draw a simple waterfall, right? Like, who doesn’t love waterfalls? They’re majestic, serene, and just look so chill on paper when done right. Whether you’re picking up a pencil for the first time or just looking to refine your skills, drawing a waterfall can be super fun and surprisingly easy if you follow the right steps. Stick around, and we’ll break it down for you in a way that even the most nervous beginner can handle. No fancy art degrees needed, just a pencil, paper, and a willingness to give it a shot.
Let’s face it, drawing nature is one of the coolest things an artist can do. Waterfalls in particular have this magical quality that makes them feel alive. The way the water flows, the rocks surrounding it, and the mist in the air—all of that can be captured with just a few lines and some shading tricks. It’s not as hard as it seems, trust me. By the end of this guide, you’ll have a beautiful waterfall sketch that you can proudly show off to your friends or frame for your wall.
Now, before we dive into the nitty-gritty of how to draw a simple waterfall, let’s set the mood. Grab your favorite drawing tools—pencils, erasers, maybe even some colored pencils if you want to spice things up—and find a comfy spot. This is going to be less of a lecture and more of a chill hangout session where we explore creativity together. Let’s get started!
Why Drawing Waterfalls Is So Rewarding
Alright, let’s talk about why waterfalls are such a great subject to draw. First off, they’re dynamic. Unlike, say, a tree or a mountain, waterfalls are constantly moving. That movement gives your drawing a sense of life and energy, which is always a plus. Plus, waterfalls come in all shapes and sizes, so you’ve got plenty of inspiration to work with. From tiny streams tumbling over rocks to massive cascades plunging into deep pools, there’s something for everyone.
Another reason waterfalls are awesome to draw? They’re full of texture. Think about it—the water itself has a smooth, flowing quality, but then there’s the roughness of the rocks, the lushness of the surrounding foliage, and maybe even some mist or spray if you’re feeling fancy. All of these elements give you a chance to experiment with different techniques and really flex your artistic muscles.
What You’ll Need to Get Started
Before we jump into the drawing process, let’s make sure you’ve got everything you need. Here’s a quick list of essentials:
- Pencils (HB, 2B, 4B for shading)
- Eraser (a kneaded eraser is great for softening lines)
- Sketch paper (nothing too fancy, just something you’re comfortable working on)
- Blending tools (optional, like a blending stump or tissue)
- Colored pencils or markers (if you want to add color later)
Don’t stress too much about having the "perfect" tools. You can totally start with what you have at home and upgrade later if you want to get serious about your art. The most important thing is to have fun and not take yourself too seriously. Mistakes happen, and that’s part of the process!
Understanding the Basics of Waterfall Anatomy
Let’s break down the anatomy of a waterfall real quick. A waterfall isn’t just a big splash of water—it’s a combination of several key elements that work together to create its beauty. Here’s what you need to know:
- The Source: This is where the water comes from, usually a river or stream. Think about how the water flows and where it gains momentum.
- The Edge: This is the point where the water starts to fall. Pay attention to the shape of the edge—it can be jagged, smooth, or anywhere in between.
- The Fall: This is the main event. The water plunges downward, creating movement and energy. Observe how the water splits into streams or droplets as it falls.
- The Base: At the bottom of the waterfall, the water collects in a pool or continues flowing. This area often includes rocks, plants, and other natural elements.
By understanding these components, you’ll be able to create a more realistic and dynamic waterfall. Don’t worry if it doesn’t look perfect at first—art is all about practice!
Step 1: Sketching the Basic Shape
Alright, let’s put pencil to paper! Start by lightly sketching the basic shape of your waterfall. Think about the overall composition—where do you want the waterfall to sit on the page? Do you want it to be the focal point, or do you want to include other elements like trees or rocks in the background?
Here’s a tip: use simple shapes to block out the main areas of your drawing. For example, you might start with a rectangle for the main body of the waterfall, a curved line for the edge, and a circle or oval for the base pool. These shapes will serve as a guide as you refine your drawing.
Adding Details to the Waterfall
Once you’ve got the basic shape down, it’s time to start adding details. Begin by defining the edge of the waterfall. Is it smooth and flowing, or jagged and rocky? Use short, gentle strokes to create the illusion of movement. Remember, water isn’t static—it’s constantly shifting, so don’t be afraid to make your lines a little messy.
Next, focus on the fall itself. Use longer, flowing lines to show how the water cascades downward. You can also add some droplets or spray to give the waterfall more texture. Keep your lines light at first—you can always darken them later once you’re happy with the overall look.
Step 2: Adding Rocks and Surrounding Elements
Now that you’ve got the waterfall itself sorted, it’s time to add some context. Rocks are a key part of any waterfall drawing, and they can really bring your piece to life. Start by sketching in the rocks around the base of the waterfall. Think about their size, shape, and texture. Some rocks might be smooth and rounded, while others could be sharp and angular.
In addition to rocks, consider adding other natural elements like trees, ferns, or moss. These details can help create a more immersive scene and give your waterfall a sense of place. Don’t go overboard, though—remember, the waterfall is the star of the show!
Creating Texture with Shading
Shading is where your drawing really starts to pop. To create the illusion of texture, use a combination of light and dark tones. For the rocks, focus on adding shadows in the crevices and highlights on the raised surfaces. For the water, use gentle shading to show how the light reflects off the surface.
Here’s a trick: use a blending tool to soften your shading and create a more realistic look. If you want to add some extra depth, try using a kneaded eraser to lift out highlights in strategic areas. It’s all about creating contrast and making your drawing feel three-dimensional.
Step 3: Refining Your Drawing
At this point, your drawing should be taking shape. Now it’s time to refine the details and clean up any stray lines. Go over your pencil marks with a darker pencil or pen if you want to make them stand out. Pay attention to the flow of the water and the texture of the rocks—these are the elements that will make your waterfall look authentic.
Don’t forget to erase any guidelines you used earlier. You want your final piece to look polished and professional. If you’re happy with the pencil version, you can stop here, or you can take it a step further by adding color.
Coloring Your Waterfall (Optional)
If you’re feeling adventurous, consider adding some color to your drawing. Waterfalls are full of vibrant hues, from the deep blues of the water to the lush greens of the surrounding foliage. Use colored pencils, markers, or even watercolors to bring your waterfall to life.
Remember, less is more when it comes to coloring. Stick to a limited palette to keep your drawing cohesive, and don’t be afraid to layer colors to create depth. A little bit of shading can go a long way in making your colors pop!
Tips for Drawing Realistic Water
Water can be tricky to draw because it’s so fluid and unpredictable. Here are a few tips to help you capture its essence:
- Study reference photos to see how water behaves in different situations.
- Practice drawing different types of water, like ripples, waves, and splashes.
- Use a light touch when shading water to avoid making it look too heavy.
- Experiment with blending techniques to create a smooth, flowing effect.
Remember, practice makes perfect. The more you draw water, the better you’ll get at capturing its unique qualities.
Common Mistakes to Avoid
Even the best artists make mistakes from time to time. Here are a few common pitfalls to watch out for when drawing waterfalls:
- Overworking the details: Sometimes less is more. Don’t feel like you need to include every single rock or leaf in your drawing.
- Ignoring perspective: Make sure your waterfall looks like it belongs in its environment. Pay attention to the size and placement of surrounding elements.
- Forgetting about lighting: Shadows and highlights can make or break a drawing. Take the time to think about where the light is coming from and how it affects your scene.
By keeping these tips in mind, you’ll be able to avoid some of the most common mistakes and create a more polished final product.
Inspiration and Ideas for Your Waterfall Drawing
Still not sure what kind of waterfall to draw? Here are a few ideas to get you started:
- A small cascade tumbling over mossy rocks in a forest setting.
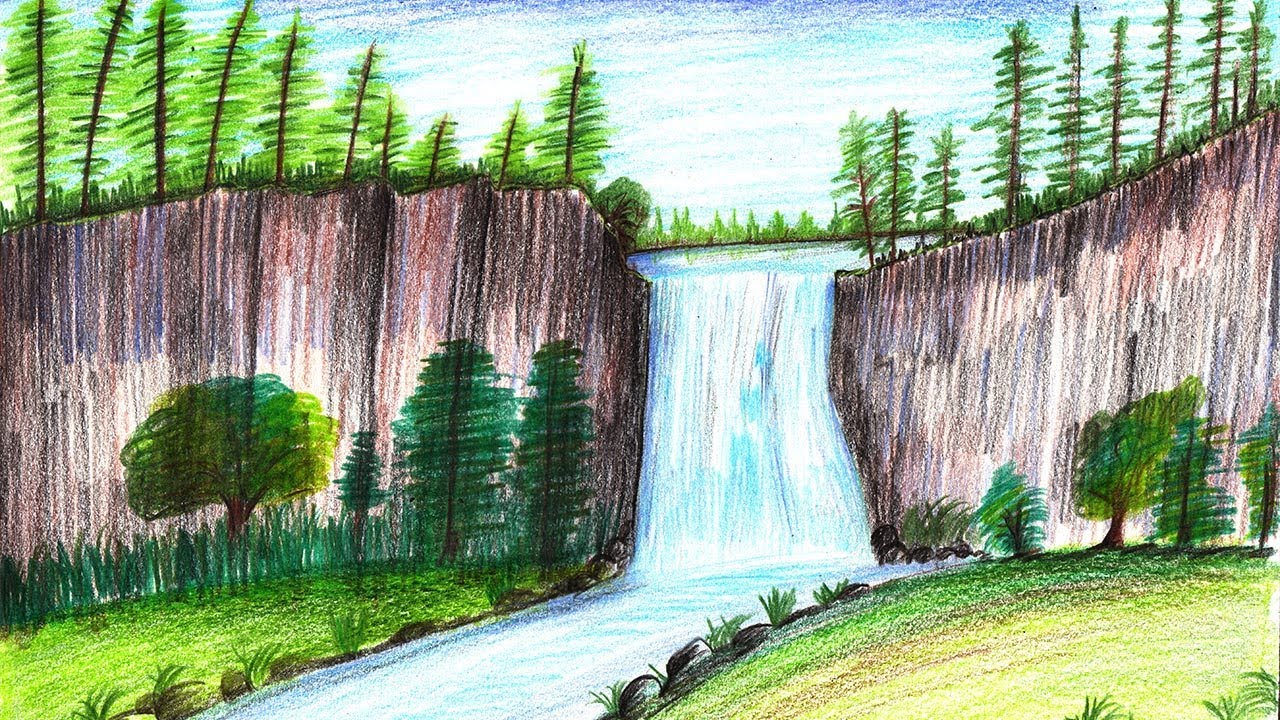
- A dramatic cliffside waterfall with mist rising into the air.
- A serene pool surrounded by wildflowers and lily pads.
- A tropical waterfall with lush palm trees and vibrant colors.
The possibilities are endless! Don’t be afraid to mix and match elements to create your own unique scene. After all, this is your artwork—make it yours!
Exploring Different Styles
While realism is great, don’t feel like you have to stick to one style. Experiment with different approaches, like abstract or impressionistic techniques. Maybe you want to focus on the movement of the water rather than the details of the rocks. Or maybe you want to use bold, vibrant colors to create a dreamlike atmosphere. The choice is yours!
Conclusion: Keep Practicing and Have Fun
And there you have it—a step-by-step guide to drawing a simple waterfall. Whether you’re a seasoned artist or a total newbie, I hope this article has inspired you to pick up your pencil and give it a try. Remember, art is all about expressing yourself and having fun, so don’t get too caught up in perfection. Every stroke you make is a step toward becoming a better artist.
So, what are you waiting for? Grab your tools and start drawing! And when you’re done, don’t forget to share your masterpiece with the world. Who knows? You might just inspire someone else to give drawing a shot. Happy creating!
Table of Contents
- Why Drawing Waterfalls Is So Rewarding
- What You’ll Need to Get Started
- Understanding the Basics of Waterfall Anatomy
- Step 1: Sketching the Basic Shape
- Adding Details to the Waterfall
- Step 2: Adding Rocks and Surrounding Elements
- Creating Texture with Shading
- Step 3: Refining Your Drawing
- Coloring Your Waterfall (Optional)
- Tips for Drawing Realistic Water
- Common Mistakes to Avoid
- Inspiration and Ideas for Your Waterfall Drawing
- Exploring Different Styles
- Conclusion: Keep Practicing and Have Fun