Throwing a party and need some cool party favors? Mini piñatas are the ultimate way to add a touch of excitement and creativity to your event. Whether it's a birthday bash, holiday celebration, or just a fun get-together, these mini piñatas will be the talk of the town. Plus, they're super easy to make! So, grab your craft supplies and let's dive into the world of mini piñata magic.
There’s nothing like a mini piñata to bring joy and surprise to any celebration. These tiny treasures are not only adorable but also packed with surprises. From candies to small trinkets, mini piñatas can hold all sorts of delightful treats that your guests will love. Best of all, they’re budget-friendly and super customizable, making them a perfect fit for any theme or occasion.
Whether you're hosting a kids' birthday party, a bridal shower, or even a corporate event, mini piñatas party favors are a fantastic idea. They’re hands-on, interactive, and leave a lasting impression. Plus, they’re a great conversation starter! So, let’s get started and learn how to make mini piñatas that will impress your guests and keep them smiling long after the party ends.
Why Mini Piñatas Are the Perfect Party Favors
Let’s face it—party favors are essential for leaving a lasting impression on your guests. But why settle for boring goody bags when you can create something truly unique and memorable? Mini piñatas are not just cute; they’re interactive and filled with surprises. They add a festive touch to any event and are a great way to show your guests how much you care.
Here’s why mini piñatas are the ultimate party favor:
- They’re customizable to fit any theme or occasion
- They’re cost-effective and easy to make in bulk
- They bring an element of surprise and excitement
- They’re eco-friendly if you use recycled materials
- They’re fun to decorate and personalize
And the best part? Your guests will love the idea of taking home a mini piñata filled with their favorite treats. It’s a win-win situation!
What You’ll Need to Make Mini Piñatas
Before we dive into the step-by-step guide, let’s talk about the materials you’ll need. Don’t worry; you probably already have most of these items at home. If not, they’re easily available at any craft store or online. Here’s a quick list of what you’ll need:
- Paper mache balloons (or small balloons if you’re making them from scratch)
- Tissue paper in various colors
- Glue or mod podge
- Scissors
- String or ribbon
- Treats to fill the piñatas (candies, small toys, etc.)
- A stapler
- A hole puncher
Optional items include glitter, paint, or decorative stickers if you want to add extra flair to your mini piñatas. The possibilities are endless!
Step-by-Step Guide to Making Mini Piñatas
Now that you have all your materials ready, let’s get to the fun part—making the mini piñatas! Follow these simple steps, and you’ll have a batch of adorable mini piñatas in no time.
Step 1: Inflate the Balloons
Start by inflating your balloons to the desired size. For mini piñatas, you’ll want to keep them small—about the size of a tennis ball. Make sure the balloons are not over-inflated, as they need to hold their shape while you work on them.
Step 2: Prepare the Paper Mache
If you’re starting from scratch, you’ll need to make paper mache. Mix one part flour with two parts water to create a paste. Dip strips of newspaper into the paste and layer them onto the balloons. Let them dry completely before moving on to the next step.
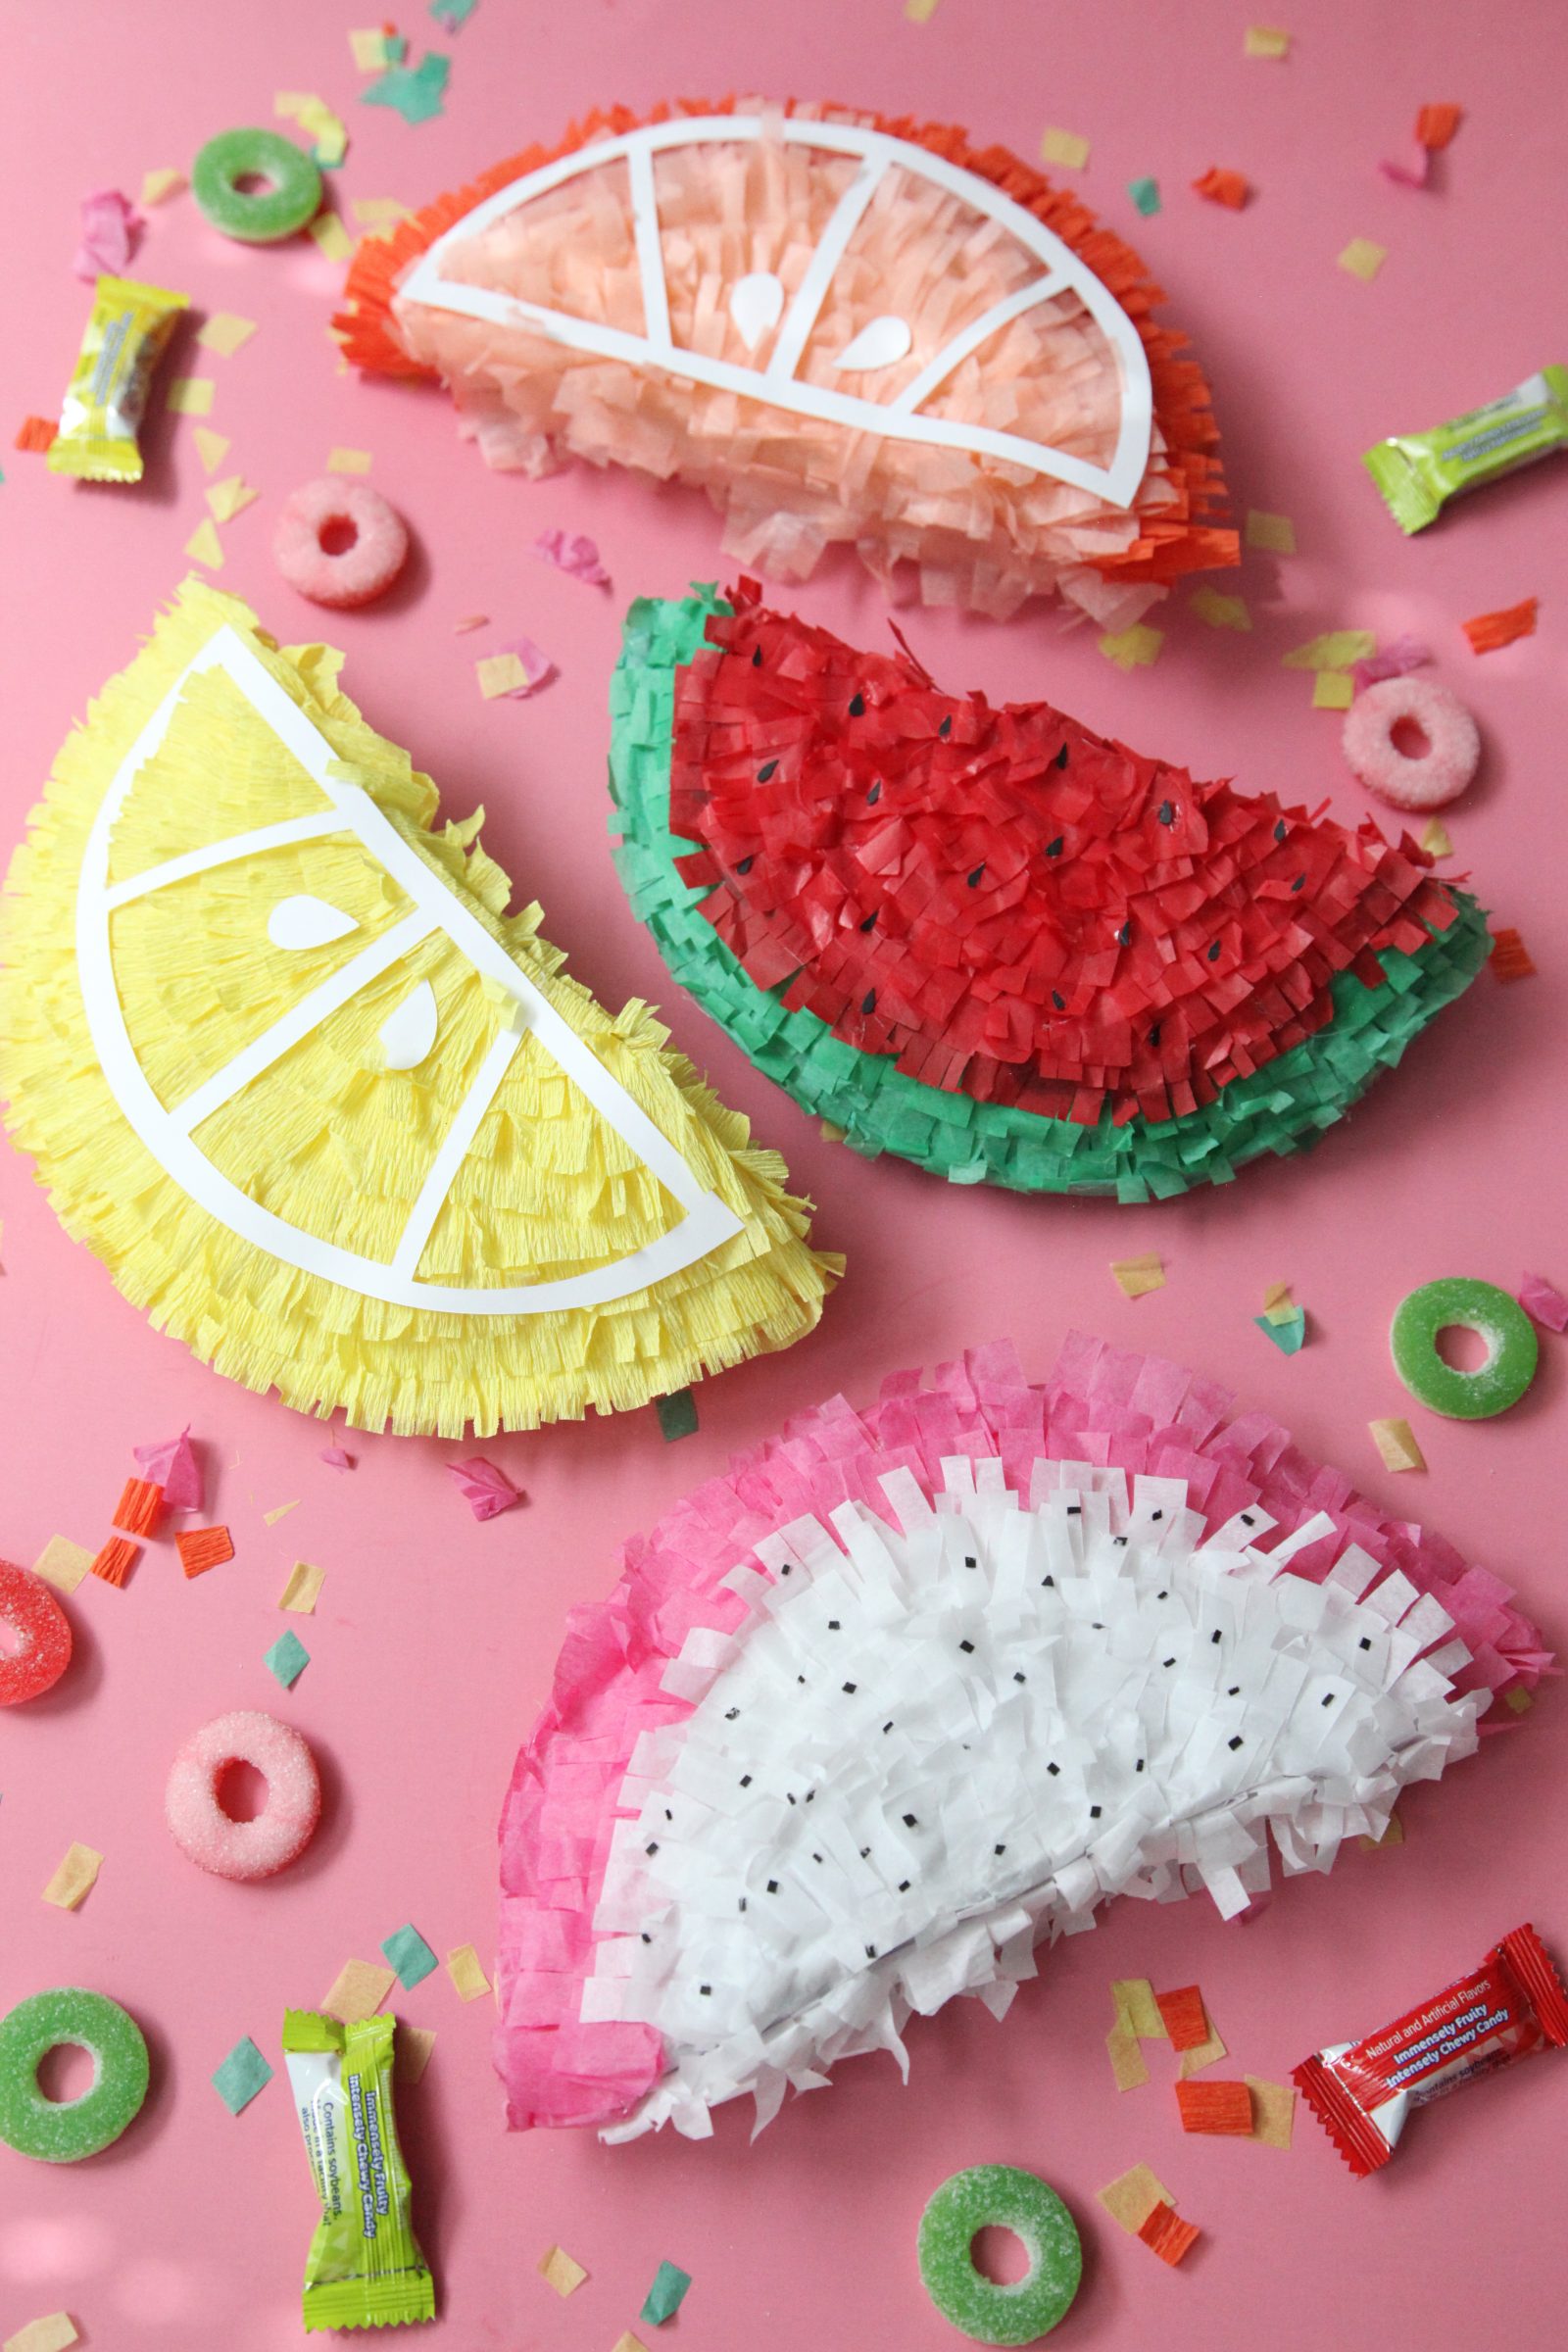
Step 3: Decorate with Tissue Paper
Once the paper mache is dry, it’s time to decorate! Cut your tissue paper into small strips or shapes. Apply glue or mod podge to the surface of the piñata and stick the tissue paper on. Overlap the pieces to create a seamless look. You can use different colors to match your party theme.
Step 4: Add the Finishing Touches
Now it’s time to add some flair. Use glitter, paint, or stickers to give your mini piñatas a personal touch. You can also add ribbons or streamers for an extra festive look. Get creative and let your imagination run wild!
Step 5: Fill and Seal the Piñatas
Once your piñatas are fully decorated and dry, it’s time to fill them with treats. Pop the balloon inside and create a small opening at the top. Fill the piñata with candies, small toys, or any other surprises you have in mind. Seal the opening with tape or staples and attach a string or ribbon for hanging.
Choosing the Right Treats for Your Mini Piñatas
The treats you choose to fill your mini piñatas can make or break the experience. Here are some ideas to get you started:
- Candies: Skittles, M&Ms, gummy bears, and chocolate coins are always a hit
- Small toys: Bouncy balls, temporary tattoos, and mini puzzles are great for kids
- Customized items: Personalized chocolates or printed stickers can add a special touch
- Eco-friendly options: Seeds, dried fruits, or biodegradable confetti are perfect for environmentally conscious events
Remember to consider your audience when choosing the treats. For example, if you’re hosting a bridal shower, you might want to opt for elegant trinkets like mini candles or scented sachets.
How to Customize Mini Piñatas for Different Occasions
One of the best things about mini piñatas is that they can be customized for any occasion. Here are a few ideas to inspire you:
Birthday Party Theme
For a birthday party, you can create mini piñatas in the shape of balloons, stars, or animals. Use bright colors and fun patterns to match the party theme. Don’t forget to add the birthday child’s name or age to make it extra special.
Holiday Celebration
Mini piñatas are a great addition to any holiday celebration. For Christmas, you can make mini piñatas shaped like ornaments or snowflakes. For Halloween, try creating spooky ghost or pumpkin piñatas. The possibilities are endless!
Corporate Event
Even corporate events can benefit from the fun and excitement of mini piñatas. Use your company’s logo or colors to create branded piñatas that your guests will love. You can also fill them with promotional items or small gifts to promote your business.
Tips for Making Mini Piñatas Look Professional
While mini piñatas are fun and easy to make, there are a few tips to keep in mind if you want them to look professional:
- Use high-quality tissue paper for a smoother finish
- Apply multiple layers of tissue paper to ensure the piñatas are sturdy
- Use a hot glue gun for a more secure seal
- Experiment with different shapes and sizes to add variety
- Practice beforehand to perfect your technique
With these tips, your mini piñatas will look just as good as the ones you see in stores—only better because they’re handmade!
Common Mistakes to Avoid When Making Mini Piñatas
Even the most experienced crafters make mistakes from time to time. Here are some common pitfalls to avoid when making mini piñatas:
- Using too much glue, which can make the piñatas soggy and difficult to work with
- Not letting the paper mache dry completely before decorating
- Overfilling the piñatas, which can cause them to burst prematurely
- Not sealing the piñatas properly, which can lead to spills
- Forgetting to add a string or ribbon for hanging
By keeping these tips in mind, you’ll avoid common mistakes and ensure your mini piñatas turn out perfectly every time.
How to Store and Transport Mini Piñatas
Once your mini piñatas are complete, it’s important to store and transport them properly to avoid damage. Here are some tips:
- Store the piñatas in a cool, dry place to prevent the tissue paper from curling
- Use a sturdy box or container to transport the piñatas to your event
- Wrap each piñata in tissue paper or bubble wrap for extra protection
- Avoid stacking the piñatas too high, as they may crush each other
With proper care, your mini piñatas will arrive at your event looking as good as the day you made them.
Conclusion
Making mini piñatas party favors is a fun and creative way to add excitement to any event. With a few simple materials and a bit of creativity, you can create mini piñatas that will delight your guests and leave a lasting impression. Whether you’re hosting a birthday party, holiday celebration, or corporate event, mini piñatas are a great way to show your guests how much you care.
So, what are you waiting for? Grab your craft supplies and start making mini piñatas today! And don’t forget to share your creations with us in the comments below. We’d love to see what you come up with. Happy crafting!
Table of Contents
- Why Mini Piñatas Are the Perfect Party Favors
- What You’ll Need to Make Mini Piñatas
- Step-by-Step Guide to Making Mini Piñatas
- Choosing the Right Treats for Your Mini Piñatas
- How to Customize Mini Piñatas for Different Occasions
- Tips for Making Mini Piñatas Look Professional
- Common Mistakes to Avoid When Making Mini Piñatas
- How to Store and Transport Mini Piñatas
- Conclusion