Ever found yourself staring at a broken flip flop and wondering if it's game over? Don’t panic! Repairing a flip flop is easier than you think, and with a few simple tools, you can bring your favorite sandals back to life. Whether it's a torn strap, a broken sole, or just general wear and tear, this guide will walk you through the process step by step.
You don’t need to be a professional cobbler to fix your flip flops. With a little creativity and some basic know-how, you can save yourself a trip to the store and a chunk of cash. Plus, repairing your flip flops is a great way to reduce waste and live a more sustainable lifestyle. Who knew DIY could be so rewarding?
Let’s dive into the nitty-gritty of how to repair a flip flop. We’ll cover everything from assessing the damage to choosing the right materials and tools. By the end of this guide, you’ll be a flip flop repair pro, ready to tackle any sandal-related emergency that comes your way. So grab your tools and let’s get started!
Table of Contents
- Assessing the Damage
- Tools and Materials You’ll Need
- How to Fix a Broken Flip Flop Strap
- Repairing a Torn or Worn-Out Sole
- Choosing the Right Glue for Your Flip Flops
- Dealing with Smelly Flip Flops
- Preventing Future Damage
- Pro Tips for Flip Flop Maintenance
- FAQs About Flip Flop Repairs
- Conclusion: Save Your Sandals, Save the Planet
Assessing the Damage
Before you start fixing your flip flops, it’s important to take a good look at what’s actually wrong with them. Is it the strap that’s giving you trouble? Or is the sole starting to break apart? Maybe it’s just a matter of wear and tear, and all you need is a good clean and some love. Whatever the issue, assessing the damage is the first step to figuring out how to repair a flip flop.
Here’s a quick checklist to help you identify the problem:
- Are the straps torn or coming loose?
- Is the sole separating from the rest of the sandal?
- Are there holes or cracks in the material?
- Is the sandal just plain smelly and in need of a good cleaning?
Once you’ve figured out what’s wrong, you can move on to the next step: gathering your tools and materials. Trust me, this is the fun part!
Tools and Materials You’ll Need
Now that you’ve assessed the damage, it’s time to gather everything you’ll need to fix your flip flops. The good news is, you probably already have most of these items lying around the house. If not, they’re super easy to find at your local hardware or craft store.
Basic Tools for Flip Flop Repairs
Here’s a list of the tools and materials you’ll need to repair a flip flop:
- Super Glue: This is your best friend when it comes to fixing broken straps and soles.
- Sandpaper: Use this to rough up the surfaces before applying glue for better adhesion.
- Scissors: For trimming frayed edges or cutting new straps if necessary.
- Needle and Thread: If you’re dealing with fabric straps, sewing them back together can be a great option.
- Plastic or Leather Repair Kit: These kits often come with everything you need to repair more serious damage.
Remember, the key to a successful repair is having the right tools. Don’t skimp on quality here – a good pair of scissors and some strong glue can make all the difference!
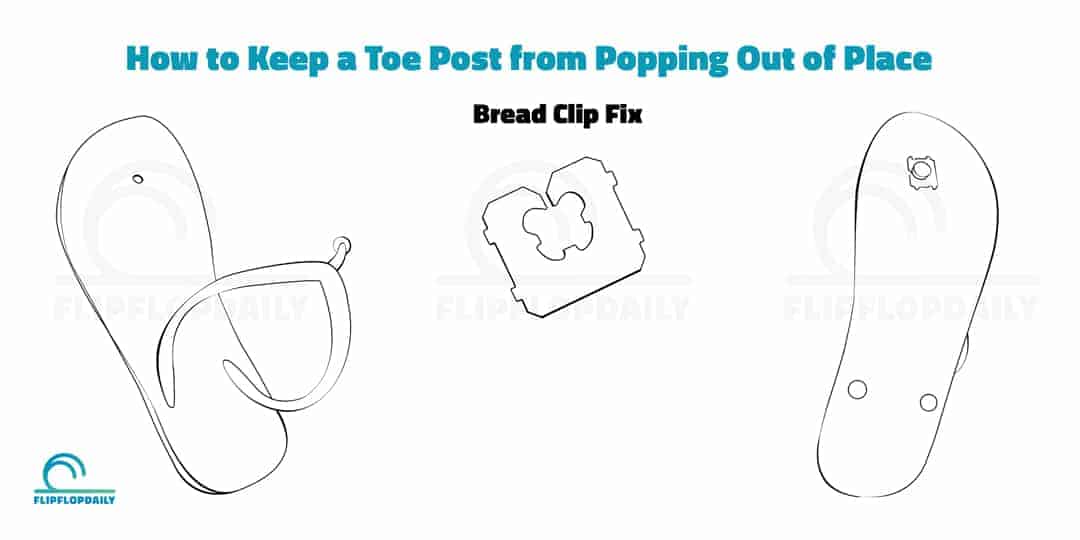
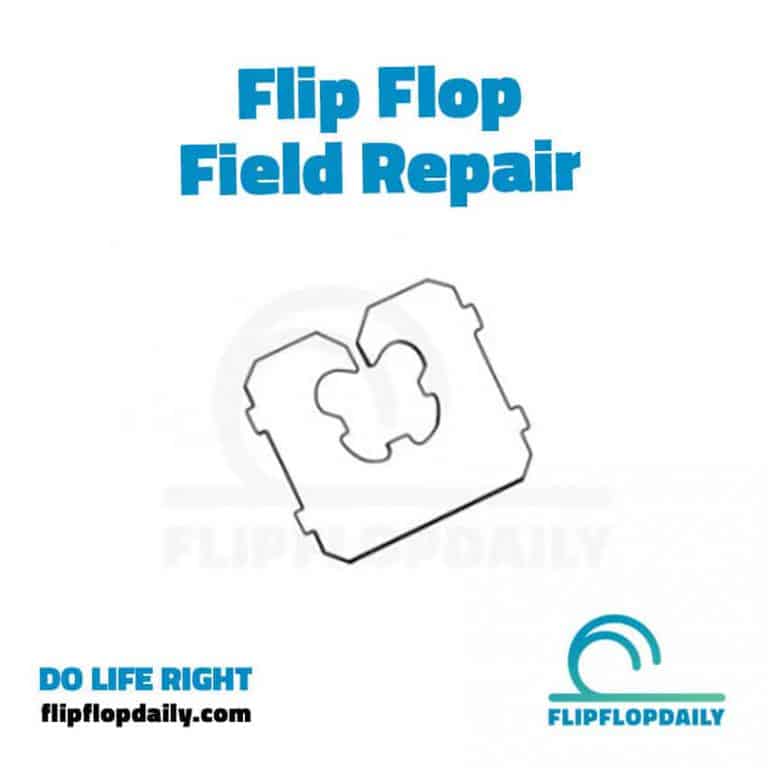
How to Fix a Broken Flip Flop Strap
One of the most common flip flop issues is a broken strap. Whether it’s snapped completely or just coming loose, fixing a strap is relatively simple and can be done in just a few steps.
Step-by-Step Guide to Fixing a Strap
Here’s how you can repair a broken flip flop strap:
- Clean the Area: Make sure the area around the strap is clean and free of dirt or debris.
- Rough It Up: Use sandpaper to rough up the surfaces where the strap attaches to the sole. This will help the glue adhere better.
- Apply Glue: Use a strong adhesive like super glue or E6000 to reattach the strap. Make sure to follow the instructions on the glue for the best results.
- Press and Hold: Press the strap firmly into place and hold it for a few minutes to ensure it sticks. You can also use a clamp or heavy object to keep it in place while the glue dries.
- Let It Dry: Allow the glue to dry completely before wearing your flip flops again. This usually takes a few hours, but it’s worth the wait!
If the strap is beyond repair, you can always replace it with a new one. Just make sure to match the color and material as closely as possible for a seamless look.
Repairing a Torn or Worn-Out Sole
A torn or worn-out sole can make your flip flops uncomfortable and even dangerous to wear. But don’t worry – there are ways to fix this issue and extend the life of your sandals.
Tips for Repairing a Sole
Here’s what you can do to repair a torn or worn-out sole:
- Use Shoe Goo: This heavy-duty adhesive is perfect for repairing soles. Apply it to the torn area and press the pieces together firmly.
- Apply a Sole Patch: If the damage is too extensive, you can use a rubber sole patch to cover the affected area. These patches are easy to find and can be trimmed to fit your flip flops perfectly.
- Sand Down Rough Edges: If the sole is starting to peel, use sandpaper to smooth out the edges and prevent further damage.
Remember, a well-maintained sole is key to keeping your flip flops comfortable and durable. Don’t neglect this important part of your sandals!
Choosing the Right Glue for Your Flip Flops
When it comes to repairing flip flops, choosing the right glue is crucial. Not all glues are created equal, and using the wrong one can lead to a failed repair. So how do you know which glue to use?
Top Glues for Flip Flop Repairs
Here are some of the best glues for fixing your flip flops:
- Super Glue: Great for quick fixes and small repairs. Just be careful not to get it on your skin!
- E6000: This industrial-strength adhesive is perfect for more serious repairs. It works on a variety of materials, including rubber, plastic, and fabric.
- Shoe Goo: Ideal for repairing soles and other heavy-duty parts of your flip flops. It dries flexible, which is perfect for shoes.
No matter which glue you choose, make sure to follow the instructions carefully and give it plenty of time to dry. Patience is key when it comes to glue!
Dealing with Smelly Flip Flops
Let’s face it – flip flops can get pretty smelly, especially if you wear them a lot. But before you throw them out, try these simple tricks to freshen them up:
How to Get Rid of Flip Flop Odor
- Baking Soda: Sprinkle some baking soda inside your flip flops and let it sit overnight. This will help absorb odors and leave your sandals smelling fresh.
- Vinegar Spray: Mix equal parts water and white vinegar in a spray bottle and spritz your flip flops. Let them air dry in the sun for a natural disinfectant effect.
- Essential Oils: Add a few drops of your favorite essential oil to the baking soda or vinegar spray for a pleasant scent.
These simple remedies can work wonders for keeping your flip flops smelling fresh and clean. And the best part? They’re all natural and easy to do!
Preventing Future Damage
Prevention is always better than cure, and this is especially true when it comes to flip flops. By taking a few simple steps, you can extend the life of your sandals and avoid the need for frequent repairs.
Tips for Preventing Flip Flop Damage
Here’s how you can prevent future damage to your flip flops:
- Alternate Your Sandals: Don’t wear the same pair of flip flops every day. Give them a break to prevent excessive wear and tear.
- Store Them Properly: Keep your flip flops in a cool, dry place when you’re not wearing them. This will help prevent mold and mildew.
- Clean Them Regularly: Wipe down your flip flops with a damp cloth and mild soap every few weeks to keep them looking their best.
By following these tips, you can keep your flip flops in great condition and avoid costly repairs down the line.
Pro Tips for Flip Flop Maintenance
Here are a few pro tips to help you maintain your flip flops and keep them looking great:
- Use a Shoe Tree: If your flip flops are losing their shape, try using a shoe tree to help them retain their form.
- Invest in a Quality Pair: While cheap flip flops are tempting, investing in a higher-quality pair can save you money in the long run.
- DIY Customization: Get creative and personalize your flip flops with paint, beads, or other embellishments. It’s a fun way to make them truly yours!
These tips will not only help you maintain your flip flops but also make them a reflection of your personal style. So why not have a little fun while you’re at it?
FAQs About Flip Flop Repairs
Here are some frequently asked questions about repairing flip flops:
- Can I repair flip flops with duct tape? While duct tape can work in a pinch, it’s not a permanent solution. Stick with a strong adhesive for long-lasting results.
- How long does it take for glue to dry on flip flops? Most glues will need a few hours to dry completely, but always check the instructions for the best results.
- Can I replace the straps on my flip flops? Absolutely! With a little creativity and some basic sewing skills, you can replace the straps and give your flip flops a whole new look.
If you have any other questions, feel free to leave them in the comments below. I’d love to help!
Conclusion: Save Your Sandals, Save the Planet
Repairing a flip flop is not only a great way to save money, but it’s also an eco-friendly choice that helps reduce waste. By taking the time to fix your sandals instead of throwing them away, you’re doing your part to protect the planet. And let’s be honest – who doesn’t love a good DIY project?
So next time you find yourself with a broken flip flop, don’t despair. Grab your tools, follow this guide, and get to work. You’ll be walking in style (and comfort) in no time!
Don’t forget to share this article with your friends and family. The more people who know how to repair their flip flops, the better for everyone. And