Let’s be real, drawing a river with pencil is one of those skills that sounds simple but can get pretty tricky if you don’t know what you’re doing. Whether you're a beginner artist looking to add some water features to your landscape or just someone who wants to flex their creative muscles, this guide is here to help. rivers are more than just lines on paper—they’re a flow of life, energy, and movement, and capturing that essence takes practice and technique. So grab your pencils, let’s dive in!
Now, before we get all artsy-fartsy, let’s talk about why drawing rivers is such a big deal. Rivers have this magical way of bringing life to any artwork. They add depth, motion, and a sense of tranquility that can make even the simplest sketch look like a masterpiece. Plus, once you master this skill, you’ll be able to apply it to other elements like waterfalls, lakes, and even ocean waves. Pretty cool, right?
And hey, don’t stress if your first attempts don’t turn out perfect. That’s part of the journey. Every great artist started somewhere, and every river begins as a single drop of water. So, let’s channel our inner Van Gogh (or Monet, if you prefer) and learn how to draw a river with pencil like a pro.
Table of Contents
- Introduction to Drawing Rivers
- Essential Tools You’ll Need
- Understanding the Basics of Rivers
- Step-by-Step Guide to Drawing a River
- Mastering Shading Techniques
- Pro Tips for Realistic Rivers
- Avoiding Common Mistakes
- Exploring Different River Styles
- Finding Inspiration for Your Art
- Final Thoughts and Call to Action
Introduction to Drawing Rivers
Why Rivers Matter in Art
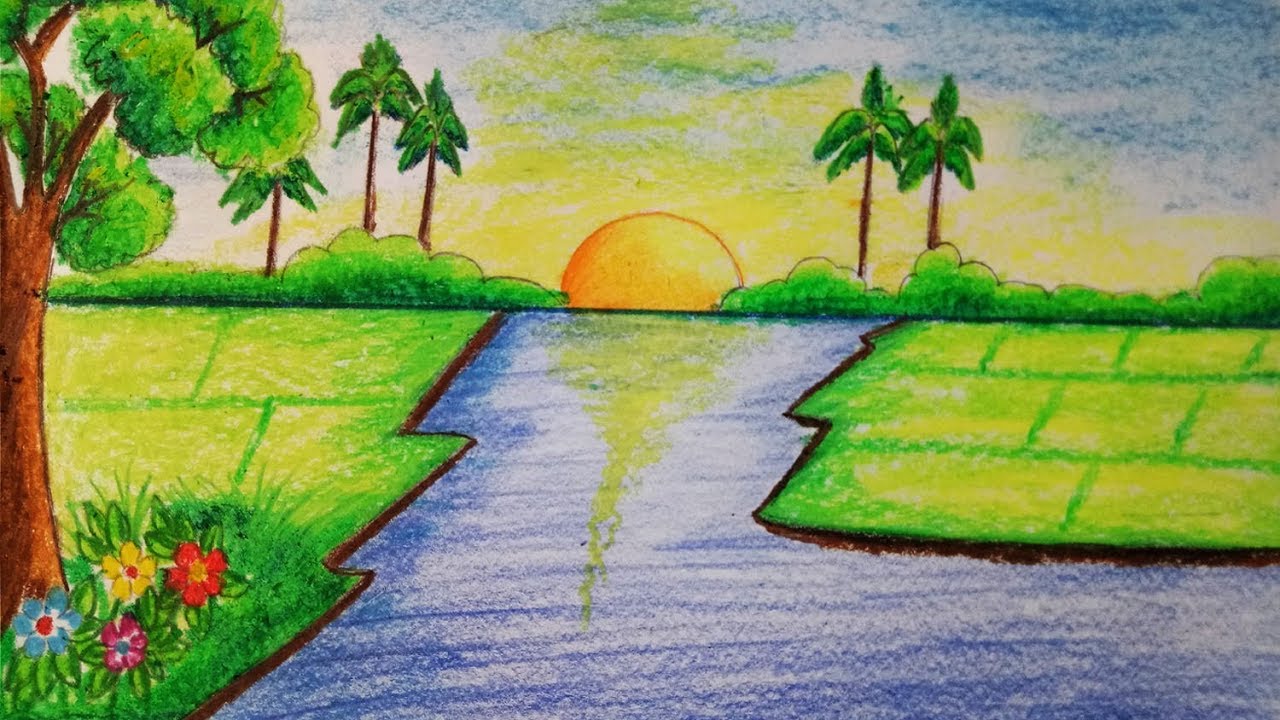
Rivers are not just bodies of water—they’re storytelling elements. In art, they symbolize life, change, and continuity. Drawing a river isn’t just about replicating its shape; it’s about capturing its soul. When you draw a river, you’re inviting viewers into a world where movement meets stillness, where nature feels alive on paper. That’s powerful stuff!
But here’s the thing: rivers aren’t one-size-fits-all. They come in different shapes, sizes, and moods. Some are calm and serene, while others are wild and untamed. Understanding these nuances is key to creating realistic and engaging artwork.
Essential Tools You’ll Need
Before we start sketching, let’s talk about the tools you’ll need. You don’t have to break the bank to get started—just a few essentials will do the trick:
- Pencils: A set of graphite pencils ranging from 2H to 6B is ideal. The lighter ones (2H) are great for outlining, while the darker ones (6B) add depth and shading.
- Eraser: A kneaded eraser is perfect for softening lines and creating highlights.
- Paper: Choose a smooth surface for detailed work or a textured one for a more natural feel.
- Blending Tools: Tortillons or blending stumps can help smooth out your shading.
Pro tip: Don’t underestimate the power of a sharpener. A dull pencil tip can ruin even the best-laid plans!
Understanding the Basics of Rivers
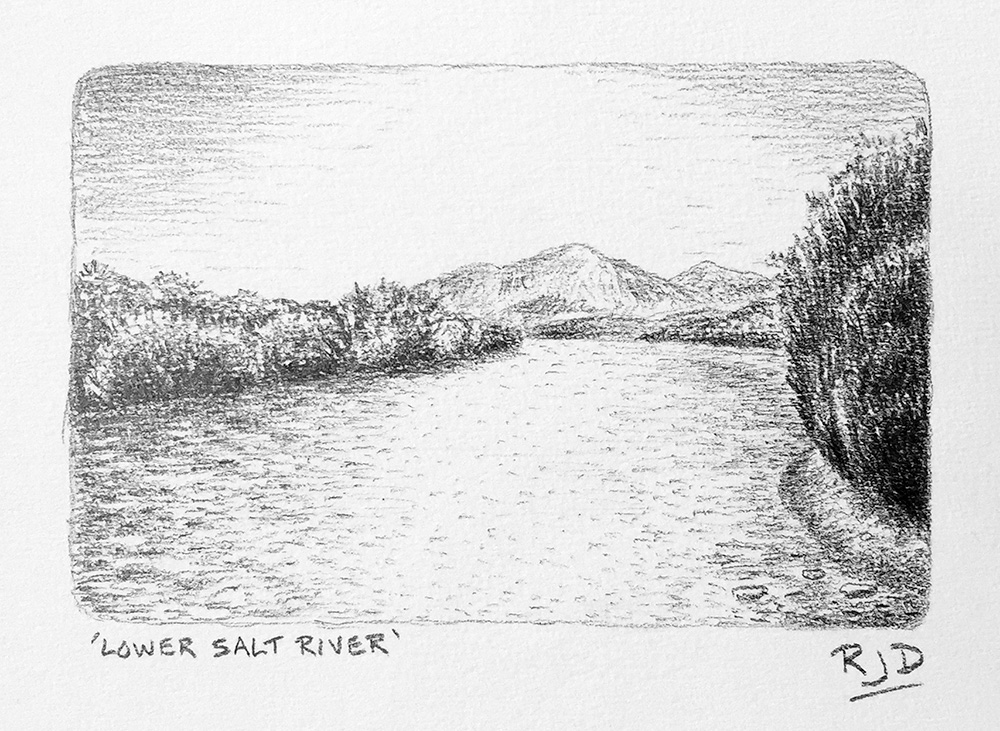
What Makes a River Look Real?
To draw a convincing river, you need to understand its anatomy. Rivers aren’t just straight lines—they twist, turn, and meander through landscapes. Here are a few things to keep in mind:
- Flow: Rivers follow the path of least resistance, so they rarely travel in a straight line. Think about how water interacts with rocks, trees, and other obstacles.
- Reflections: Water reflects light differently depending on its surface. Calm rivers mirror the sky, while turbulent ones create ripples and splashes.
- Depth: Rivers aren’t flat—they have varying depths that affect how light passes through them. Use shading to convey this depth.
By paying attention to these details, you’ll create a river that feels alive and dynamic.
Step-by-Step Guide to Drawing a River
Now that you’ve got the basics down, let’s break it into manageable steps:
Step 1: Sketch the Basic Shape
Start with a light outline of the river’s path. Use a 2H pencil for this step so you can easily erase any mistakes. Remember, rivers aren’t perfect—they curve and bend naturally. Don’t worry too much about precision at this stage.
Step 2: Add Details to the Banks
Once you’ve established the river’s path, focus on the banks. Are they rocky, sandy, or covered in vegetation? Adding these details will give your river context and make it more believable.
Step 3: Create Movement with Lines
Water is all about motion, so use curved lines to suggest the flow of the river. These lines should follow the river’s path and vary in thickness to mimic turbulence.
Step 4: Shade for Depth
Use a 4B or 6B pencil to add shading to the river. Focus on areas where the water is deeper or where shadows fall from surrounding objects. This will give your river dimension and realism.
Step 5: Highlight and Finish
Finally, use a kneaded eraser to lift out highlights and create reflections. This step ties everything together and brings your river to life.
Mastering Shading Techniques
Shading is the secret sauce of realistic river drawings. Here are a few techniques to try:
- Hatching: Parallel lines that create texture and depth.
- Cross-Hatching: Overlapping lines for a more complex shading effect.
- Stippling: Small dots that add detail and shading without overwhelming the drawing.
Experiment with these techniques to see which works best for your style. And remember, practice makes perfect!
Pro Tips for Realistic Rivers
Here are a few insider tips to take your river drawings to the next level:
- Study real rivers to understand how they behave in different conditions.
- Pay attention to lighting—where is the sun coming from, and how does it affect the water’s appearance?
- Don’t be afraid to layer your shading for a richer, more dynamic look.
And most importantly, have fun with it! Art is about self-expression, so let your creativity flow like a river.
Avoiding Common Mistakes
Even the best artists make mistakes. Here are a few to watch out for:
- Overworking the Drawing: Too much shading or detail can make your river look cluttered. Know when to stop.
- Ignoring Perspective: Rivers should get narrower as they recede into the distance. This creates a sense of depth and realism.
- Forgetting Reflections: Water reflects the world around it, so don’t skip this important detail.
By avoiding these pitfalls, you’ll create rivers that look natural and believable.
Exploring Different River Styles
From Calm to Chaotic
Not all rivers are created equal. Try experimenting with different styles to find what works for you:
- Calm Rivers: Focus on smooth lines and gentle reflections for a peaceful vibe.
- Rapid Rivers: Use jagged lines and heavy shading to convey energy and movement.
- Fantasy Rivers: Let your imagination run wild with glowing water or magical elements.
The possibilities are endless—so go ahead and explore!
Finding Inspiration for Your Art
Art is all about inspiration, and rivers are no exception. Look to nature, photography, and even other artists for ideas. Visit a local river or stream and sketch what you see. Or, if you can’t get outside, browse online galleries for stunning river landscapes.
Remember, inspiration can come from anywhere. Keep an open mind and let your creativity flow!
Final Thoughts and Call to Action
So there you have it—a comprehensive guide to drawing rivers with pencil. Whether you’re a seasoned artist or just starting out, mastering this skill will take your artwork to new heights. Rivers are more than just water—they’re a symbol of life, movement, and beauty. By capturing their essence on paper, you’re not just drawing—you’re creating magic.
Now it’s your turn! Grab your pencils and start sketching. Share your creations with the world, and don’t forget to leave a comment below. We’d love to hear about your artistic journey and see what you’ve created. Happy drawing, and remember—every great river starts with a single drop!