Let’s be real here, folks—life gets messy. But if there’s one thing that can help you regain control of your clutter, it’s mastering how to put together a bankers box. These handy little (or big) containers are the ultimate organizational tools for documents, files, and more. Whether you’re decluttering your home office or prepping for a move, knowing how to assemble these boxes is a game-changer. So grab your coffee, and let’s dive right into it!
Now, before we get our hands dirty, let’s talk about why the bankers box has become such a staple. These bad boys are designed to hold loads of paper without collapsing under pressure—literally. They’re sturdy, stackable, and super versatile. Plus, they come in different sizes to fit all your storage needs. Whether you’re dealing with old tax records or important client files, these boxes have got your back.
But here’s the thing—not everyone knows how to put together a bankers box properly. Trust me, I’ve seen some epic fails. From taped-up seams that won’t hold to flimsy bottoms that collapse at the worst possible moment. That’s why this guide is here—to walk you through every step of the process so you can become a bankers box pro in no time. Ready? Let’s go!
Here’s what we’ll cover in this article:
- What is a Bankers Box?
- Tools You’ll Need
- Step-by-Step Guide to Assembling a Bankers Box
- Tips for Maximizing Your Bankers Box
- Common Mistakes to Avoid
- Proper Storage Techniques
- Customizing Your Bankers Box
- Eco-Friendly Alternatives
- Cost Considerations
- Final Thoughts
What is a Bankers Box?
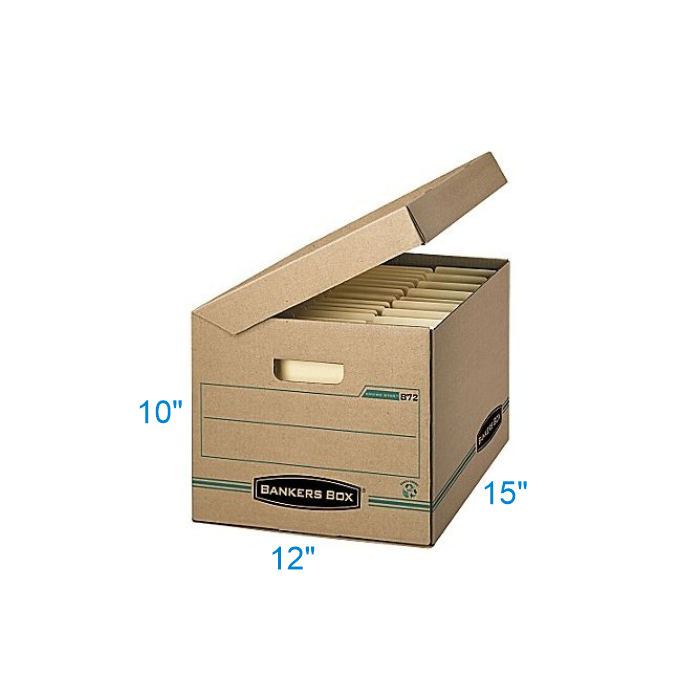
Alright, let’s start with the basics. A bankers box is essentially a reinforced cardboard box designed specifically for storing large amounts of paper documents. It’s called a “bankers box” because it was originally created to store important financial records, but today, it’s used by everyone from lawyers to homeowners.
Here’s a quick breakdown:
- Size: The most common size is 1 cubic foot, but you can find them in larger sizes too.
- Material: Made from thick, durable cardboard to prevent collapsing under weight.
- Features: Reinforced edges, handles for easy carrying, and a design that allows stacking.
Now that you know what it is, let’s move on to the fun part—how to put it together!
Tools You’ll Need
Before you start assembling your bankers box, make sure you have the right tools. Here’s a list of essentials:
Essential Tools
- Scissors or a box cutter: To cut through tape or cardboard if needed.
- Packing tape: For sealing the bottom and any other parts that need reinforcement.
- A flat surface: A sturdy table or floor space where you can lay out the box.
- Gloves (optional): To protect your hands from cuts or splinters.
With these tools in hand, you’re ready to tackle the next step.
Step-by-Step Guide to Assembling a Bankers Box
Alright, here’s the main event. Follow these steps carefully, and you’ll have a perfectly assembled bankers box in no time.
Step 1: Unfold the Box
Take your flat bankers box and carefully unfold it. Make sure all the flaps are laying flat on your work surface. You should see a grid-like structure with perforated lines marking where the folds will go.
Step 2: Fold the Bottom
Start by folding the bottom flaps one by one. There are usually four flaps—two short ones and two long ones. Fold the short flaps up first, then fold the long flaps over them to create a secure seal.
Step 3: Secure the Bottom
Use packing tape to secure the bottom flaps. Run the tape along the seam where the flaps meet to ensure it’s sturdy. This is crucial because the last thing you want is for the bottom to give out when it’s loaded with heavy documents.
Step 4: Fold the Sides
Now, fold the sides of the box upward. Most bankers boxes have pre-scored lines that make this step easy. Once the sides are up, tuck in the small tabs at the corners to lock everything into place.
Step 5: Seal the Top
Once your box is filled, repeat the process for the top flaps. Fold them in the same order as the bottom, then tape them securely. If you’re planning to stack the boxes, reinforce the top with extra tape for added stability.
And there you have it—a perfectly assembled bankers box!
Tips for Maximizing Your Bankers Box
Now that you know how to put together a bankers box, here are a few tips to help you use them more effectively:
- Label everything: Use a permanent marker to clearly label each box with its contents and date.
- Organize by category: Group similar items together to make retrieval easier.
- Avoid overloading: While bankers boxes are strong, they have limits. Don’t exceed the recommended weight.
- Stack smart: Place heavier boxes on the bottom and lighter ones on top to prevent collapse.
These tips will help you get the most out of your bankers boxes while keeping your space organized.
Common Mistakes to Avoid
Even the best of us make mistakes sometimes. Here are a few common errors to watch out for:
- Skipping the bottom tape: This is a rookie move that can lead to disaster.
- Overfilling the box: Too much weight can cause the sides to buckle or the bottom to give out.
- Not labeling: Without clear labels, finding what you need later becomes a nightmare.
By avoiding these mistakes, you’ll save yourself a lot of headaches down the road.
Proper Storage Techniques
Once your bankers boxes are assembled and filled, it’s important to store them properly. Here are some best practices:
Choose the Right Location
Store your boxes in a cool, dry place to prevent moisture damage. Basements and attics can be tricky because of temperature fluctuations, so consider using climate-controlled storage if necessary.
Keep Them Accessible
Stack your boxes in a way that allows easy access to the ones you’ll need most often. Rotate older boxes to the front so they don’t get forgotten.
With proper storage, your bankers boxes will last for years.
Customizing Your Bankers Box
Why stop at functionality when you can add a personal touch? Here are a few ways to customize your bankers boxes:
- Color code: Use different colored tape or markers to differentiate between categories.
- Add stickers: Fun stickers can make your boxes more visually appealing.
- Personalize labels: Create custom labels with your name or logo for a professional look.
Customization not only makes your boxes stand out but also helps with organization.
Eco-Friendly Alternatives
If you’re looking to reduce your environmental impact, consider eco-friendly alternatives to traditional bankers boxes:
- Reusable plastic bins: Durable and long-lasting, these bins can be used repeatedly.
- Recycled cardboard boxes: Look for boxes made from recycled materials to minimize waste.
- Digital storage: Whenever possible, scan and store documents digitally to reduce paper use.
Going green doesn’t mean sacrificing quality—there are plenty of sustainable options available.
Cost Considerations
Bankers boxes can vary in price depending on factors like size, material, and brand. On average, you can expect to pay between $3 and $10 per box. If you’re buying in bulk, many suppliers offer discounts. Always compare prices and read reviews to ensure you’re getting a good deal.
Final Thoughts
Knowing how to put together a bankers box is a skill that will serve you well in both personal and professional settings. By following the steps outlined in this guide, you’ll be able to assemble, organize, and store your documents with ease. Remember to avoid common mistakes, use proper storage techniques, and consider eco-friendly alternatives when possible.
Now it’s your turn! Have you tried assembling a bankers box before? Share your tips and tricks in the comments below. And don’t forget to check out our other articles for more organizational hacks. Happy boxing, folks!