Hey there, fellow DIY warrior! Ever found yourself staring at a broken drawer front and wondering how to fix it? Don’t worry; you’re not alone. Whether it’s a loose handle, a cracked veneer, or a wobbly drawer, fixing a drawer front is easier than you think. In this guide, we’ll walk you through step-by-step methods to get your drawers back in shape and looking as good as new.
Fixing a drawer front doesn’t have to be a headache-inducing experience. With the right tools, techniques, and a little patience, you can tackle this project like a pro. Whether you’re working on a vintage dresser or a modern cabinet, this guide will cover all the essentials you need to know.
So, buckle up and grab your toolkit because we’re about to dive deep into the world of drawer repair. From identifying common issues to applying long-lasting fixes, this article will help you transform your saggy, wobbly, or cracked drawer fronts into something you can be proud of. Let’s get started!
Table of Contents
- Common Issues with Drawer Fronts
- Tools You’ll Need to Fix a Drawer Front
- Step-by-Step Guide to Fix a Drawer Front
- Choosing the Right Materials for Your Drawer Front
- Preventive Measures to Avoid Future Damage
- Cost Considerations for Fixing a Drawer Front
- When to Call in the Professionals
- FAQs About Fixing Drawer Fronts
- Inspiration for Upgrading Your Drawer Fronts
- Wrapping It Up: Your Drawer Front Fixing Journey
Common Issues with Drawer Fronts
Before we jump into the nitty-gritty of how to fix a drawer front, let’s talk about the common problems you might encounter. Understanding the issue is half the battle won, right? Here are some of the most frequent drawer front problems:
- Cracked or Chipped Veneer: This happens when the surface layer of the drawer front gets damaged due to wear and tear.
- Loose or Missing Handles: Handles can become wobbly over time or even fall off completely.
- Warped or Bent Drawer Fronts: Moisture or improper storage can cause the wood to warp.
- Scratches and Stains: Everyday use can lead to unsightly scratches and stains on the surface.
These issues may seem daunting, but with the right approach, you can fix them in no time. Let’s move on to the next section to gather the tools you’ll need.
Tools You’ll Need to Fix a Drawer Front
Every great DIY project starts with the right tools. Here’s a list of essential tools and materials you’ll need to fix a drawer front:
- Screwdriver (Phillips and Flathead)
- Wood Glue
- Clamps
- Sandpaper (Fine Grit)
- Wood Filler
- Paint or Stain
- Brush or Sponge
- Measuring Tape
- Drill
Having these tools on hand will make the process smoother and more efficient. Now that you’re equipped, let’s dive into the step-by-step guide.
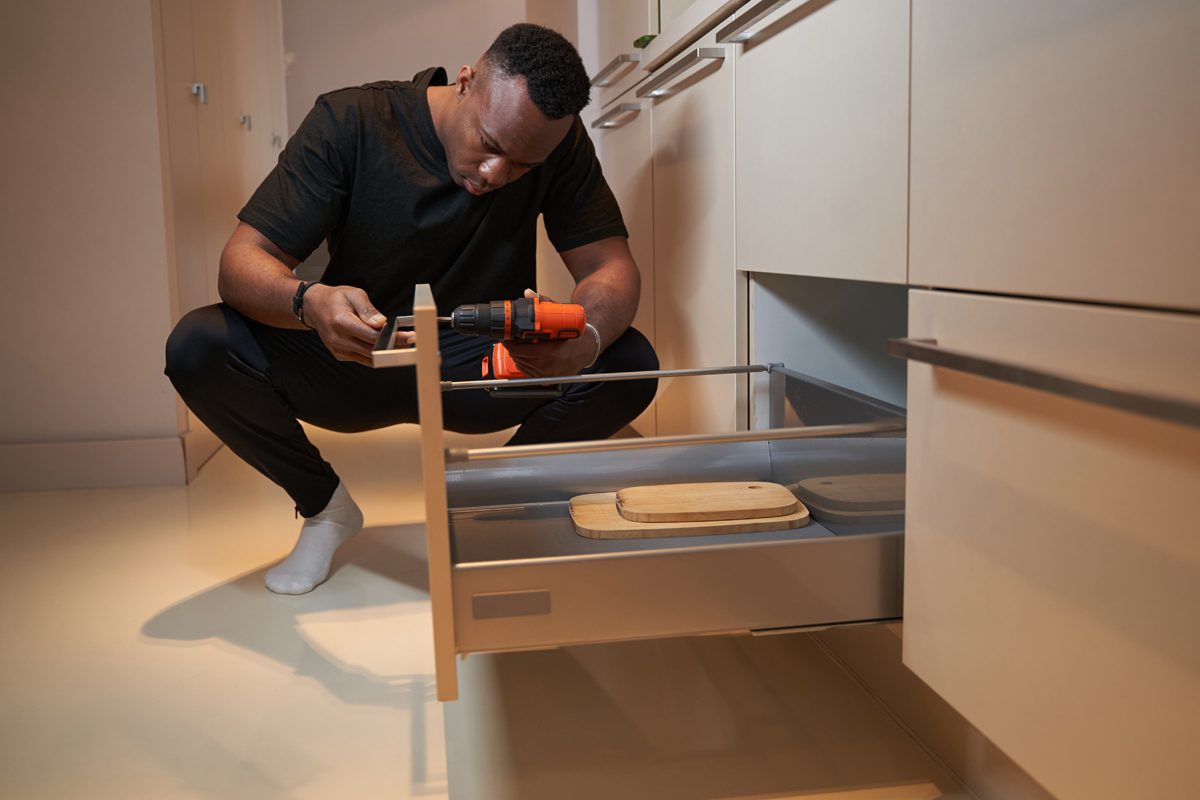
Step-by-Step Guide to Fix a Drawer Front
Step 1: Assess the Damage
The first step in fixing a drawer front is to assess the damage. Take a good look at the drawer and identify the specific problem. Is it a crack, a missing handle, or a warped surface? Knowing exactly what you’re dealing with will help you determine the best course of action.
Step 2: Remove the Drawer
Next, carefully remove the drawer from the cabinet. This will give you better access to the drawer front and make the repair process easier. Be gentle to avoid causing further damage.
Step 3: Fix the Issue
Depending on the problem, here’s how you can fix it:
- For Cracked Veneer: Apply wood glue to the crack, press the pieces together, and clamp them until the glue dries.
- For Loose Handles: Tighten the screws or replace them if necessary. If the screw holes are stripped, use toothpicks dipped in glue to fill the holes before reinserting the screws.
- For Warped Drawer Fronts: Sand down the warped areas and apply wood filler to smooth out the surface. Let it dry and sand again for a flawless finish.
Step 4: Finish and Reassemble
Once the repairs are done, finish the drawer front by painting or staining it to match the rest of the furniture. Reattach the handles and slide the drawer back into place. Voila! Your drawer is good as new.
Choosing the Right Materials for Your Drawer Front
When fixing or upgrading a drawer front, choosing the right materials is crucial. Here are some popular options:
- Wood: Durable and versatile, wood is a classic choice for drawer fronts.
- MDF (Medium-Density Fiberboard): Affordable and easy to work with, MDF is a great option for painted finishes.
- Veneer: A thin layer of wood applied to a substrate, veneer offers a natural wood look at a lower cost.
- Metal or Glass: For a modern look, consider metal or glass drawer fronts.
Selecting the right material will ensure your drawer front not only looks great but also lasts a long time.
Preventive Measures to Avoid Future Damage
Fixing a drawer front is one thing, but preventing future damage is equally important. Here are some tips to keep your drawers in tip-top shape:
- Avoid overloading drawers to prevent warping.
- Use coasters or placemats to protect the surface from moisture and heat.
- Regularly clean and maintain your furniture to prevent dirt buildup.
- Store your furniture in a dry, well-ventilated area to prevent moisture damage.
By following these preventive measures, you can extend the life of your drawers and reduce the need for repairs.
Cost Considerations for Fixing a Drawer Front
Fixing a drawer front doesn’t have to break the bank. Here’s a rough estimate of the costs involved:
- Tools: $20-$50 (if you don’t already own them)
- Materials: $10-$30 (depending on the type and amount needed)
- Professional Help: $50-$150 per hour (if you decide to hire someone)
While DIY repairs can save you money, hiring a professional might be worth it for complex issues or if you’re short on time.
When to Call in the Professionals
While many drawer front issues can be fixed at home, there are times when it’s best to call in the professionals. Here are some scenarios where professional help is recommended:
- Severe structural damage that requires expertise to repair.
- Custom or antique furniture that needs specialized care.
- Limited experience or confidence in tackling complex repairs.
Professionals have the skills and tools to handle even the toughest drawer front problems, ensuring your furniture is restored to its former glory.
FAQs About Fixing Drawer Fronts
Q: Can I replace just the drawer front?
A: Yes, you can replace just the drawer front if it’s severely damaged. Simply measure the existing front and find a replacement that matches the size and style.
Q: How long does it take to fix a drawer front?
A: Depending on the extent of the damage, fixing a drawer front can take anywhere from 30 minutes to a few hours.
Q: What type of glue is best for fixing drawer fronts?
A: Wood glue is the best option for fixing drawer fronts as it provides a strong bond and is easy to work with.
Inspiration for Upgrading Your Drawer Fronts
Once you’ve fixed your drawer front, why not take it a step further and upgrade it? Here are some ideas to inspire you:
- Paint the drawer front in a bold color for a modern look.
- Replace the handles with something more stylish or unique.
- Add decorative moldings or trim for a custom touch.
Upgrading your drawer fronts can completely transform the look of your furniture and add a personal touch to your space.
Wrapping It Up: Your Drawer Front Fixing Journey
And there you have it, folks! Fixing a drawer front is not as intimidating as it might seem. With the right tools, techniques, and a little patience, you can tackle this project like a pro. Remember to assess the damage, gather your materials, and follow the step-by-step guide for the best results.
Don’t forget to implement preventive measures to avoid future damage and consider upgrading your drawer fronts for a fresh new look. If you’re ever in doubt, don’t hesitate to call in the professionals.
Now it’s your turn! Share your drawer front fixing experiences in the comments below or tag us on social media. We’d love to see your before-and-after transformations. Happy DIY-ing, and until next time, keep those drawers rolling smoothly!