Hey there, art enthusiasts! If you're reading this, chances are you've heard about the super-trendy wolf cut hairstyle that's taken over the fashion world. But have you ever thought about how to draw wolf cut designs? Well, you're in the right place because today we’re diving deep into the art of sketching this iconic look. Whether you’re a beginner or an experienced artist, this guide will help you master the wolf cut in no time. So, grab your pencils and let's get started!
Now, before we dive into the nitty-gritty details, let me tell you why the wolf cut is such a big deal. It’s not just a hairstyle; it’s an art form that combines layers, texture, and boldness. And if you’re someone who loves experimenting with your art, this is the perfect project to explore your creativity. From sketching the base to adding those signature wolf-like layers, we’ve got everything covered.
Oh, and don’t worry if you’re not a pro yet. We’ll break it down step by step so you can create something truly amazing. By the end of this article, you’ll be able to confidently say, “I know how to draw wolf cut like a boss!” So, are you ready? Let’s go!
Table of Contents
- What is Wolf Cut?
- Tools You Need to Get Started
- Step-by-Step Guide to Draw Wolf Cut
- Adding Details and Texture
- Common Mistakes to Avoid
- Tips for Beginners
- Inspiration Ideas for Your Art
- Digital Drawing Techniques for Wolf Cut
- Final Tips for Mastering Wolf Cut Art
- Conclusion
What is Wolf Cut?
Alright, let’s talk about what exactly the wolf cut is. The wolf cut hairstyle has been making waves on social media platforms like TikTok and Instagram. It’s all about creating a layered, textured look that mimics the wild and untamed appearance of a wolf’s fur. This style is perfect for anyone who wants to add some edge to their hair or art projects.
When you’re learning how to draw wolf cut, the key is to focus on the layers. These layers give the illusion of movement and depth, which is what makes the wolf cut so appealing. Plus, it’s super versatile, so you can customize it to fit your personal style.
Tools You Need to Get Started
Before you start sketching, make sure you have the right tools. You don’t need anything fancy, but having the basics will make a huge difference in your artwork. Here’s what you’ll need:
- Pencils (HB, 2B, 4B, and 6B for shading)
- Eraser (a kneaded eraser works great for blending)
- Sketchbook or drawing paper
- Blending tools (optional)
- Reference photos of wolf cut hairstyles
Pro tip: If you’re going digital, consider using apps like Procreate or Adobe Fresco for a smoother experience.
Step-by-Step Guide to Draw Wolf Cut
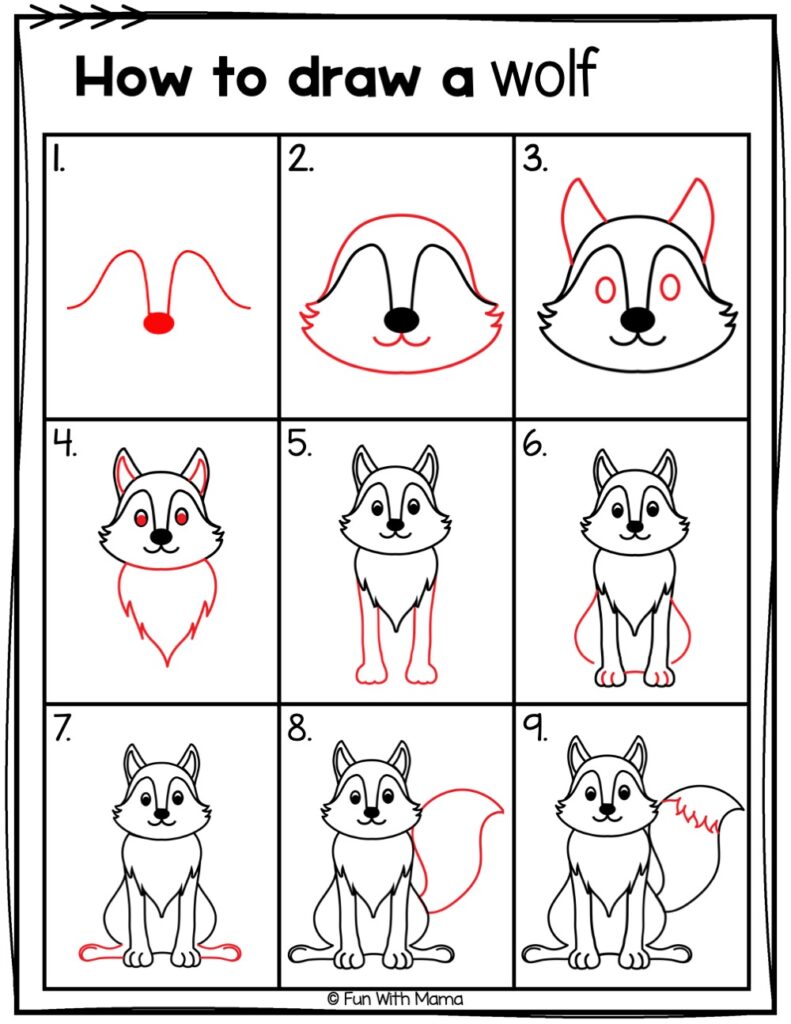
Step 1: Sketch the Base Shape
Start by drawing the outline of the head. Keep it simple—a basic oval shape with guidelines for the eyes, nose, and mouth. This will serve as the foundation for your wolf cut drawing.
Step 2: Add the Hairline
Next, sketch the hairline. The wolf cut typically has a high, curved hairline that adds to its bold look. Don’t worry about perfection here; just focus on getting the general shape.
Step 3: Layer It Up
This is where the magic happens! Begin adding layers to your drawing. Start with the longest layers at the bottom and gradually work your way up. Remember, the layers should mimic the natural flow of hair, so don’t be afraid to experiment with different lengths.
Step 4: Define the Layers
Once you’ve added the layers, go back and refine them. Use short, quick strokes to create the texture of individual strands. This will give your drawing a more realistic look.
Adding Details and Texture
Now that you’ve got the basic structure down, it’s time to add some details. Pay attention to the way the hair falls and how the layers overlap. You can also add highlights and shadows to enhance the depth of your drawing.
Here are a few tips for adding texture:
- Use cross-hatching to create shading.
- Add small lines to mimic the texture of hair.
- Experiment with different pencil pressures for varying shades.
Common Mistakes to Avoid
Even the best artists make mistakes, but knowing what to watch out for can save you a lot of time and frustration. Here are some common mistakes to avoid when learning how to draw wolf cut:
- Forgetting to add layers—this is what makes the wolf cut unique!
- Not paying attention to proportions—make sure the head and hair are in balance.
- Overworking the details—sometimes less is more.
Tips for Beginners
If you’re new to drawing, don’t worry! Here are some tips to help you get started:
- Practice sketching basic shapes first.
- Use reference photos to guide you.
- Don’t be afraid to make mistakes—it’s all part of the learning process!
Remember, the more you practice, the better you’ll get. So keep at it, and soon you’ll be sketching wolf cuts like a pro!
Inspiration Ideas for Your Art
Need some inspiration? Check out these ideas to spark your creativity:
- Combine the wolf cut with other hairstyles, like bangs or braids.
- Experiment with different textures and patterns.
- Try drawing the wolf cut on different face shapes to see how it looks.
There’s no limit to what you can create, so let your imagination run wild!
Digital Drawing Techniques for Wolf Cut
If you prefer digital art, there are tons of tools and techniques you can use to create stunning wolf cut designs. Here are a few tips:
- Use layers in your digital art software to keep things organized.
- Experiment with different brushes to achieve different textures.
- Save your work frequently—you don’t want to lose progress!
Digital drawing can be a game-changer, especially if you’re working on complex projects like the wolf cut.
Final Tips for Mastering Wolf Cut Art
Here are a few final tips to help you master the art of drawing wolf cuts:
- Practice regularly—set aside time each day to work on your skills.
- Seek feedback from other artists to improve your work.
- Stay inspired by following artists who specialize in hair and fashion art.
With dedication and practice, you’ll be creating amazing wolf cut drawings in no time!
Conclusion
And there you have it—a complete guide on how to draw wolf cut. Whether you’re a seasoned artist or just starting out, this trendy hairstyle offers endless possibilities for creativity. By following the steps outlined in this article, you’ll be able to create stunning wolf cut drawings that showcase your unique style.
So, what are you waiting for? Grab your pencils and start sketching! And don’t forget to share your work with the world. Who knows, you might just inspire someone else to try their hand at drawing wolf cuts.
Until next time, keep creating and keep dreaming big!