Let’s face it, tying a ribbon on a bouquet can seem like a piece of cake—but trust me, it’s an art form that takes practice. Whether you're preparing for a wedding, anniversary, or just want to impress someone special, getting that ribbon just right can elevate your flower arrangement from ordinary to extraordinary. In this guide, we’ll break down everything you need to know about how to tie a ribbon on a bouquet.
Now, before we dive into the nitty-gritty, let’s talk about why mastering this skill is so important. A bouquet with a beautifully tied ribbon doesn’t just look good—it makes a statement. It shows thoughtfulness, attention to detail, and a touch of elegance. And honestly? Who doesn’t love a little extra flair?
So grab your favorite flowers, pick out a ribbon that speaks to your soul, and let’s get started. This guide is packed with tips, tricks, and step-by-step instructions to help you tie ribbons like a florist in no time.
Table of Contents
- Tools You’ll Need to Tie a Ribbon on a Bouquet
- Choosing the Right Ribbon for Your Bouquet
- A Quick History of Ribbon in Floristry
- Step 1: Preparing Your Bouquet
- Step 2: Wrapping the Ribbon Around the Bouquet
- Step 3: Creating the Perfect Bow
- Alternative Ribbon Styles for Your Bouquet
- Common Mistakes to Avoid
- Pro Tips for Tying Ribbons on Bouquets
- Frequently Asked Questions About Tying Ribbons on Bouquets
Tools You’ll Need to Tie a Ribbon on a Bouquet
Before we jump into the process, let’s talk about the tools you’ll need. Having the right supplies makes all the difference, and it ensures your bouquet tying experience is smooth sailing.
What You’ll Need:
- A fresh bouquet of flowers (or artificial ones if you're practicing).
- A ribbon of your choice—satin, grosgrain, or even velvet work great!
- Floral wire or tape for securing the stems.
- Scissors to trim excess ribbon and wires.
- Your steady hands and a lot of patience!
Here’s a quick tip: Make sure your ribbon matches the vibe of your occasion. For example, weddings often call for soft pastel ribbons, while birthdays might lean toward brighter colors. It’s all about setting the tone!
Choosing the Right Ribbon for Your Bouquet
Not all ribbons are created equal, and picking the right one can make or break your bouquet’s aesthetic. Let’s break down the most popular types of ribbons used in floristry:
Types of Ribbons
- Satin Ribbons: Smooth, shiny, and versatile, satin ribbons are perfect for formal events like weddings and proms.
- Grosgrain Ribbons: These have a textured surface and are great for outdoor events because they hold up well against the elements.
- Velvet Ribbons: Luxurious and soft to the touch, velvet ribbons add a touch of opulence to any bouquet.
- Organza Ribbons: Lightweight and sheer, organza ribbons are ideal for delicate arrangements.
Remember, the width of the ribbon matters too. A narrower ribbon works better for smaller bouquets, while wider ones are better suited for larger arrangements.
A Quick History of Ribbon in Floristry
Ribbons have been a staple in floristry for centuries. Back in the Victorian era, ribbons were used to convey secret messages through the language of flowers. Each color and style carried its own meaning, making bouquets not just beautiful but meaningful as well.
Here’s a fun fact: Ribbons weren’t always made from synthetic materials. In the past, they were crafted from silk, cotton, and other natural fibers. Nowadays, advancements in technology have allowed us to create ribbons that are both durable and stunning.
| Year | Milestone |
|---|---|
| 1800s | Ribbons became popular in Victorian England for floral arrangements. |
| 1900s | Synthetic ribbons began to emerge, offering more variety and durability. |
| 2000s | Eco-friendly ribbons gained traction as sustainability became a priority. |
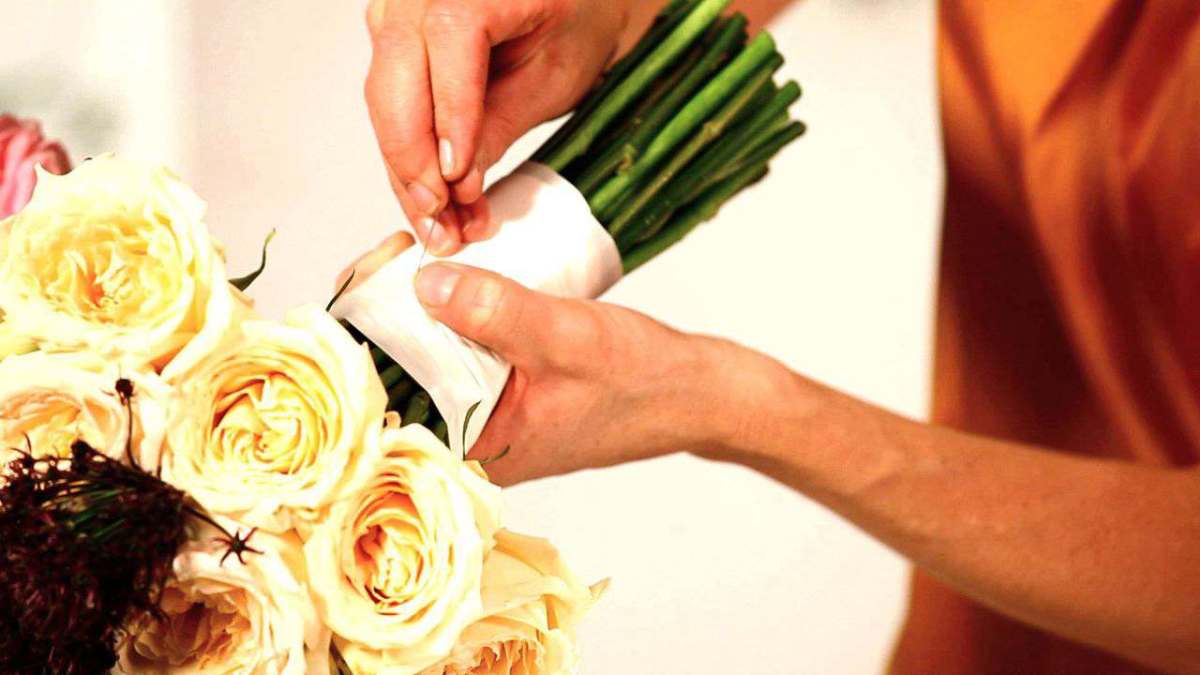
Step 1: Preparing Your Bouquet
Alright, let’s get down to business. The first step in tying a ribbon on a bouquet is preparing your flowers. This involves gathering them into a neat bunch and securing the stems.
Here’s how you do it:
- Trim the stems of your flowers so they’re all about the same length.
- Gather the flowers tightly in your hand, ensuring the heads are aligned.
- Use floral wire or tape to secure the stems near the base of the flowers. This will give you a stable foundation for tying the ribbon.
Pro Tip: Don’t rush this step! A well-prepared bouquet makes tying the ribbon a breeze.
Step 2: Wrapping the Ribbon Around the Bouquet
Now that your bouquet is ready, it’s time to wrap the ribbon around it. This part requires a steady hand and a bit of finesse.
How to Wrap the Ribbon:
- Cut a piece of ribbon that’s long enough to wrap around the bouquet several times.
- Start wrapping the ribbon around the stems, overlapping each layer slightly for a polished look.
- Make sure the ribbon is taut but not too tight, as this could damage the stems.
If you’re using a patterned ribbon, pay attention to the direction of the pattern. You want it to flow naturally and enhance the overall design of the bouquet.
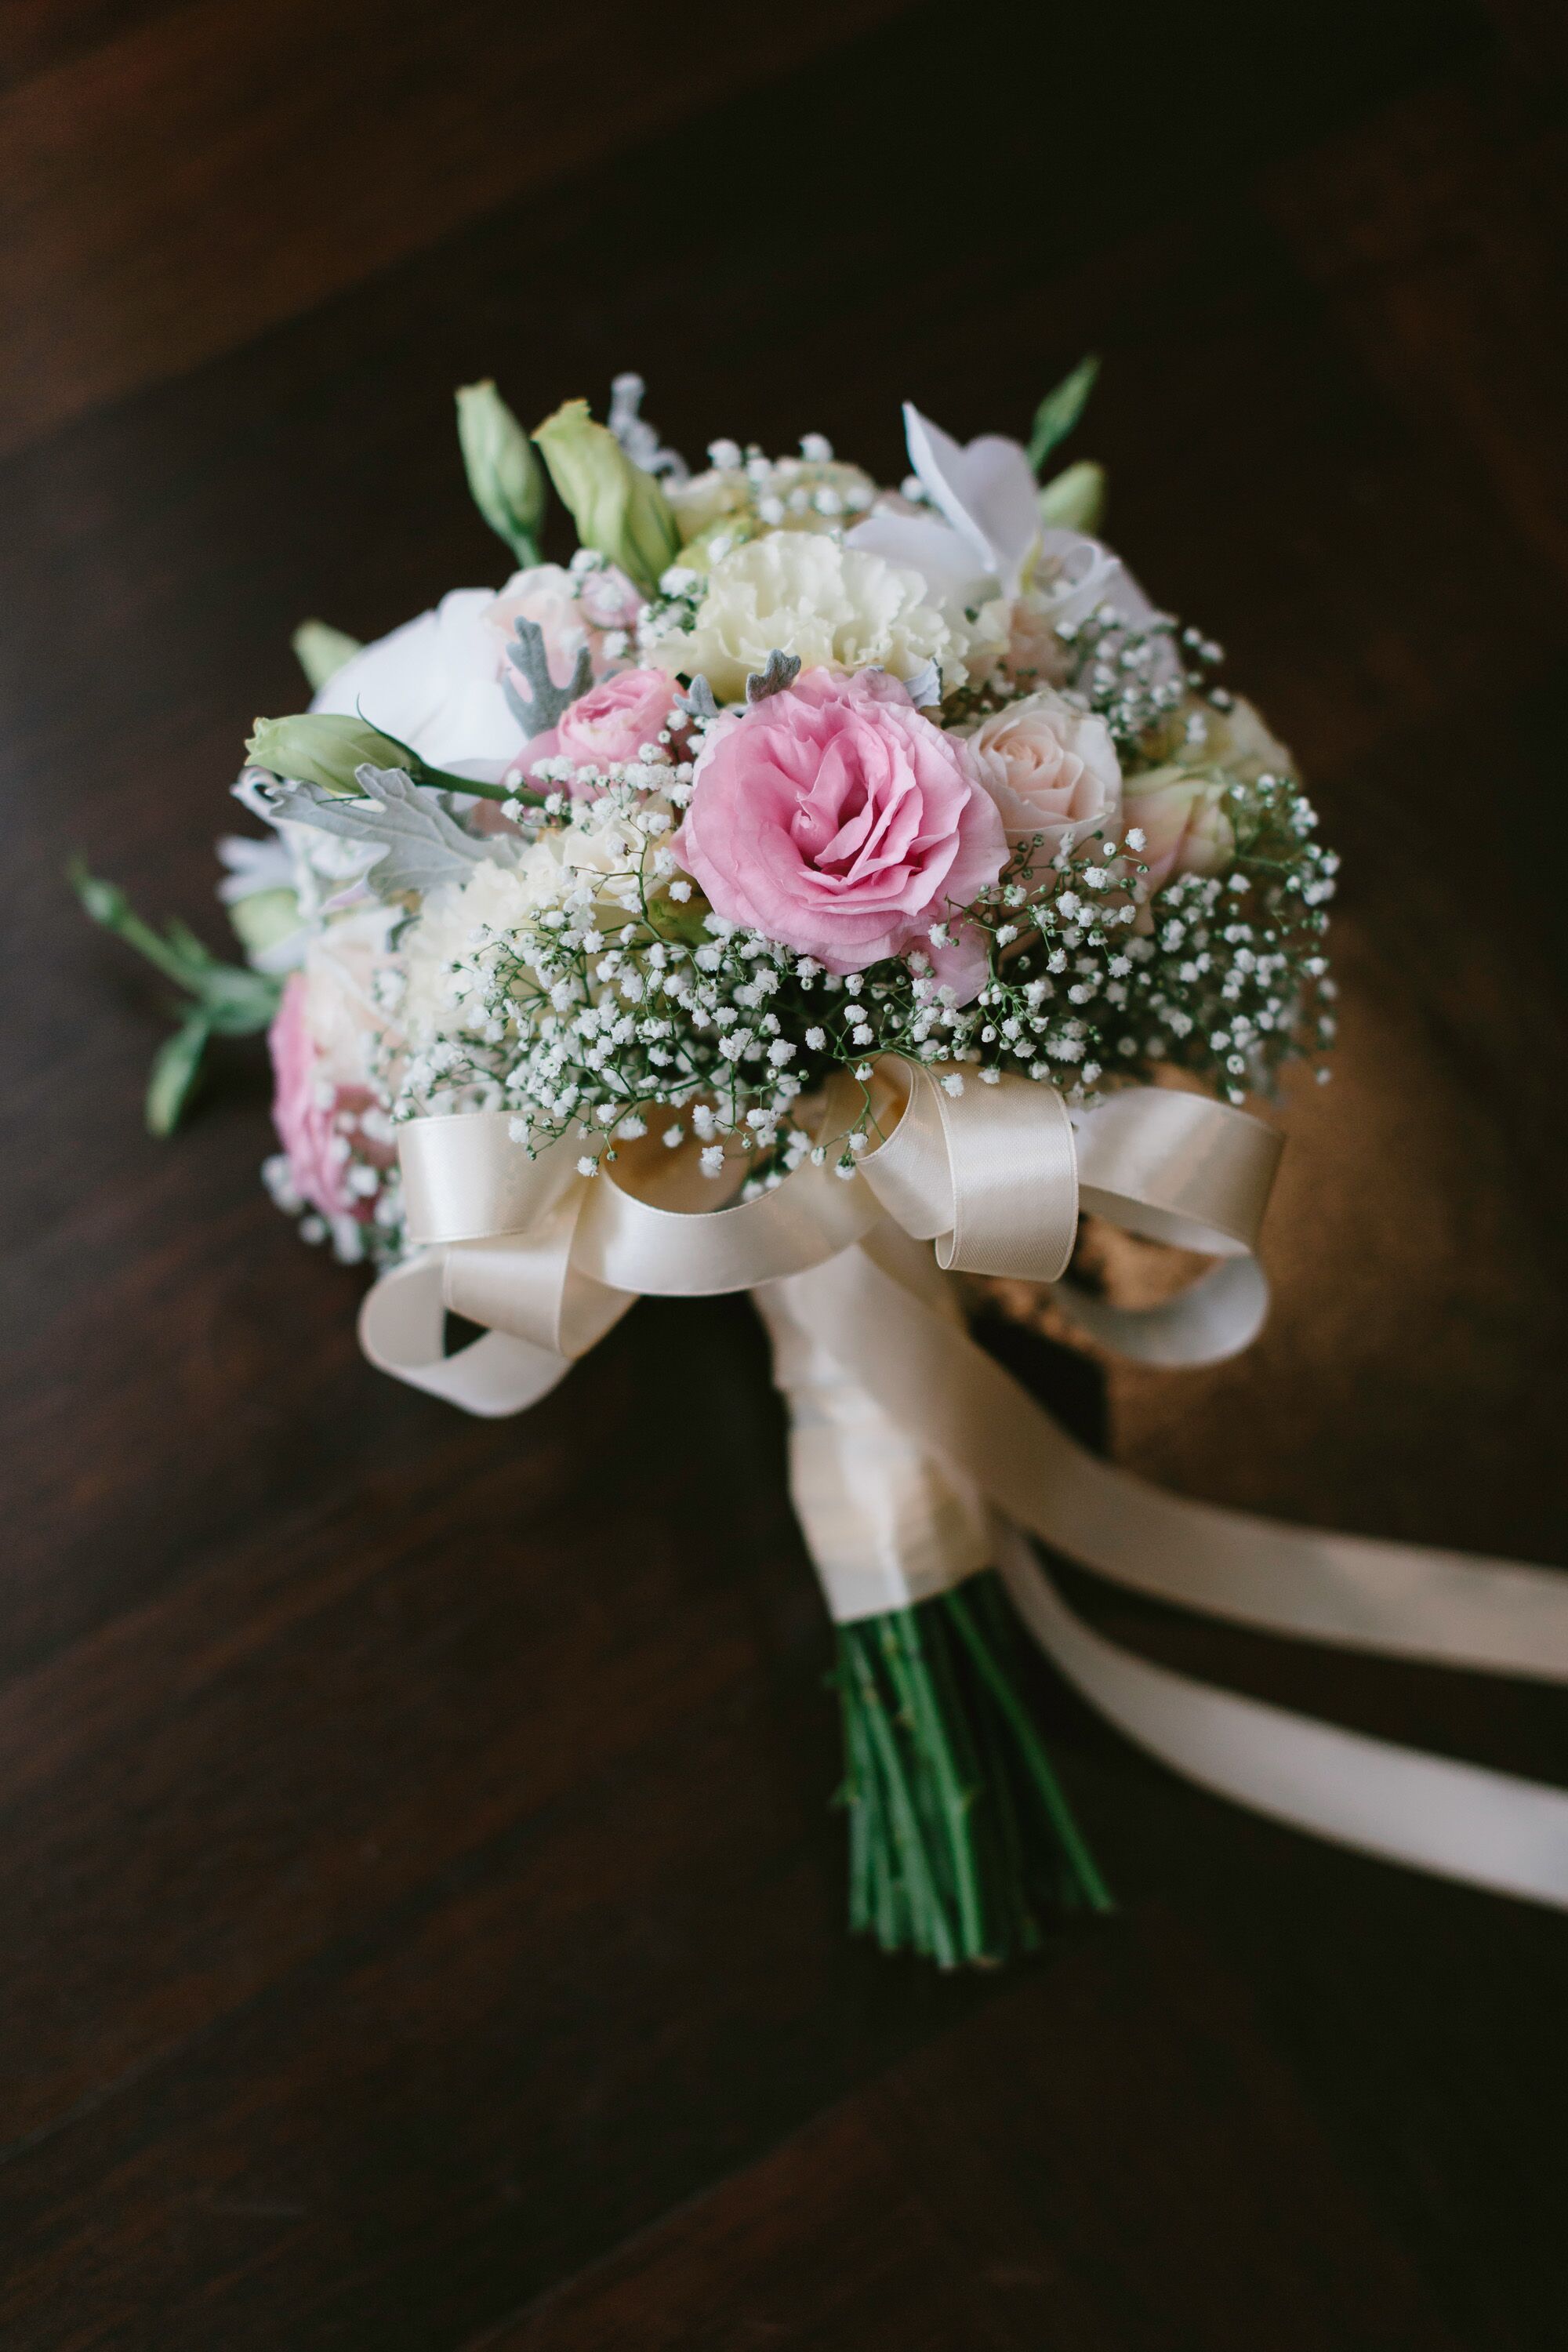
Step 3: Creating the Perfect Bow
The bow is where your bouquet ties together (pun intended). Here’s how you can create a bow that’s picture-perfect:
Steps to Create a Bow:
- Leave a tail of ribbon at the end of your wrapping.
- Form a loop with the remaining ribbon and secure it with your fingers.
- Make another loop on the opposite side and cross the two loops over each other.
- Tie the loops together tightly with the tail end of the ribbon.
- Fluff and adjust the bow until it looks symmetrical and balanced.
And just like that, you’ve got yourself a gorgeous bow! Don’t worry if it doesn’t look perfect the first time—practice makes perfect.
Alternative Ribbon Styles for Your Bouquet
Not everyone wants a traditional bow, and that’s perfectly okay! There are plenty of alternative ribbon styles you can try:
Popular Alternatives:
- Ribbon Wrap: Instead of tying a bow, simply wrap the ribbon around the stems and leave the ends hanging freely.
- Burlap Wrap: For a rustic look, use burlap ribbon instead of satin or grosgrain.
- Ribbon Rosette: Create a rosette by twisting the ribbon into a circular shape and securing it with hot glue.
Experiment with different styles to find what works best for your bouquet and occasion.
Common Mistakes to Avoid
Even the best florists make mistakes sometimes. Here are a few common pitfalls to watch out for:
- Tying the ribbon too tightly, which can crush the stems.
- Using mismatched ribbons that clash with the flowers.
- Not securing the ribbon properly, causing it to unravel.
Remember, practice and patience are key. If something doesn’t turn out right, don’t be afraid to start over. Your bouquet deserves nothing but the best!
Pro Tips for Tying Ribbons on Bouquets
Here are some additional tips to help you tie ribbons like a pro:
- Use a hot glue gun to secure loose ends if you’re worried about them fraying.
- Add a small embellishment, like a button or bead, to the center of your bow for an extra touch of elegance.
- Experiment with different textures and materials to create unique looks.
And don’t forget to have fun with it! Floristry is an art form, and your bouquet should reflect your personal style.
Frequently Asked Questions About Tying Ribbons on Bouquets
Q: Can I use any type of ribbon for my bouquet?
A: While you can technically use any ribbon, certain types work better for specific occasions. For example, satin ribbons are great for formal events, while burlap ribbons are perfect for rustic themes.
Q: How long should my ribbon be?
A: A good rule of thumb is to cut your ribbon about twice as long as the circumference of your bouquet. This gives you enough length to wrap and tie without running short.
Q: What if my bow doesn’t look perfect?
A: That’s the beauty of handmade creations—they don’t have to be perfect to be beautiful. Embrace the imperfections and let your personality shine through!
Kesimpulan
Tying a ribbon on a bouquet might seem intimidating at first, but with practice and patience, anyone can master this skill. From choosing the right ribbon to creating the perfect bow, every step adds to the overall beauty of your arrangement.
So go ahead, grab your supplies, and start experimenting. And when you’re done, don’t forget to share your masterpiece with the world. Whether it’s on social media or in person, your bouquet is sure to leave a lasting impression.
Now it’s your turn! Have you tried tying a ribbon on a bouquet before? What challenges did you face, and how did you overcome them? Leave a comment below and let’s keep the conversation going. Happy crafting!