So you're thinking about taking down that old paneling in your house? You're not alone, my friend. Many homeowners are realizing that those outdated walls just don’t cut it anymore. Whether it’s the 70s vibe or the DIY project gone wrong, removing paneling can be a game-changer for your space. But before you grab the sledgehammer and start smashing, there’s a smarter way to do it. And we’re here to show you how!
Let’s be real, folks—removing paneling isn’t exactly rocket science, but it does require some planning and the right tools. If you rush into it without knowing what you're doing, you could end up damaging your walls or worse, injuring yourself. Don’t worry, though! We’ve got all the tips and tricks you need to take down paneling like a pro.
This guide will walk you through everything from preparation to cleanup. By the time you finish reading, you’ll feel confident enough to tackle this project head-on. So, let’s dive right in and make your walls look as good as new!
Table of Contents
- Why Remove Paneling?
- Tools You'll Need
- Preparation Steps
- The Removal Process
- Common Challenges You May Face
- Repairing Damage After Removal
- Alternatives to Removing Paneling
- Cost Considerations
- Tips for Beginners
- Final Thoughts
Why Remove Paneling?
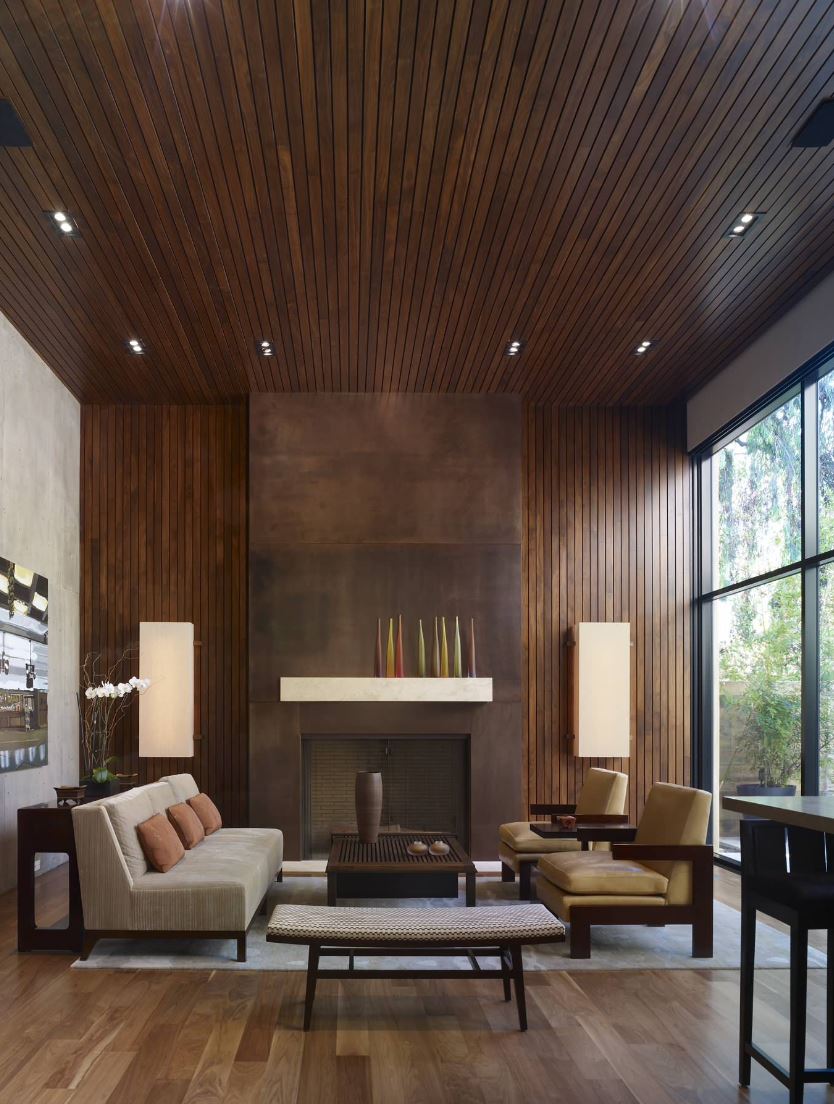
Before we jump into the nitty-gritty of how to take down paneling, let’s talk about why you might want to do it in the first place. Paneling was super popular back in the day, but these days, it’s kind of like wearing bell-bottom jeans—outdated and not exactly stylish. Plus, if your paneling is old and worn out, it might be hiding some nasty surprises behind it, like mold or water damage.
Here are a few reasons why you might want to consider removing paneling:
- It’s outdated and doesn’t match your home decor.
- It could be covering up drywall or plaster that’s in better condition.
- Old paneling might have hidden issues, like pests or moisture problems.
- Removing paneling can add value to your home if you’re planning to sell.
And let’s be honest, who doesn’t love a fresh start? Taking down paneling gives you the chance to repaint, retexture, or even add wallpaper to create a whole new look.
Tools You'll Need
Alright, now that you’re convinced it’s time to say goodbye to that old paneling, let’s talk about the tools you’ll need to get the job done. You don’t have to go out and buy a bunch of fancy equipment—most of these items are probably already in your garage or toolbox. But if you’re missing something, it’s worth investing in the right gear to make the process smoother.
Essential Tools
- Flathead screwdriver: Perfect for prying nails and loosening panels.
- Pry bar: A must-have for prying panels off the wall without causing too much damage.
- Utility knife: Great for cutting through caulk or adhesive that might be holding the panels in place.
- Hammer: For those stubborn nails that won’t budge.
- Safety goggles: Protect your eyes from flying debris.
- Dust mask: Keeps you from breathing in dust and particles.
Having the right tools makes all the difference, trust me. And don’t forget to wear old clothes because this project can get messy real quick.
Preparation Steps
Now that you’ve got your tools ready, it’s time to prepare for the big day. Prepping properly will save you a ton of headaches later on. Here’s what you need to do:
First things first, clear the room. Move all furniture and decor out of the way so you have plenty of space to work. You don’t want to trip over a chair while swinging a pry bar—that’s how accidents happen. Once the room is empty, cover the floors with drop cloths or plastic sheeting to protect them from dust and debris.
Turn Off Power
If your paneling is near any outlets or electrical wiring, make sure to turn off the power at the breaker box. Safety first, folks! The last thing you want is to accidentally cut through a live wire while prying off a panel.
Inspect the Walls
Take a good look at the paneling before you start removing it. Are there any nails or screws visible? Any gaps or cracks that might indicate how the panels are attached? Knowing what you’re dealing with ahead of time will help you plan your approach.
Pro tip: Use a stud finder to locate any nails or screws that might be hiding behind the panels. This will save you a lot of time and frustration later on.
The Removal Process
Alright, this is the moment you’ve been waiting for—the actual removal process. Don’t worry, it’s not as scary as it sounds. Just follow these steps, and you’ll be good to go.
Start at the Top
Begin by removing the top row of panels. This is usually where the panels are secured to the wall with nails or screws. Use your flathead screwdriver or pry bar to gently pry the panels away from the wall. Work slowly and carefully to avoid damaging the underlying drywall or plaster.
Work Your Way Down
Once you’ve removed the top row, move on to the next one. Continue working your way down the wall, prying each panel loose as you go. If you encounter any stubborn nails, use your hammer to tap the pry bar behind the panel to give it a little extra leverage.
Handle the Baseboards
Don’t forget about the baseboards! These are often nailed to the wall and can be tricky to remove. Use your pry bar to gently lift them off the wall, working from one end to the other. Be careful not to damage the baseboards if you plan to reuse them.
And remember, patience is key. It might take a while to get everything off, but rushing the process could lead to unnecessary damage.
Common Challenges You May Face
No project is without its challenges, and removing paneling is no exception. Here are a few common issues you might encounter and how to deal with them:
Adhesive or Caulk
Some paneling is held in place with adhesive or caulk, which can make it tricky to remove. Use your utility knife to carefully cut through the adhesive or caulk before prying the panels loose. This should help loosen the bond and make removal easier.
Hidden Wiring
As we mentioned earlier, it’s important to turn off the power before you start removing paneling. But what if you find wiring behind the panels? If you’re not comfortable dealing with electrical work, call in a professional. Safety should always come first.
Water Damage
If you discover water damage behind the paneling, it’s important to address it right away. This could be a sign of a bigger issue, like a leaky pipe or roof. Fix the source of the problem before you start repairing the walls.
Repairing Damage After Removal
Chances are, removing the paneling will leave your walls looking a little rough. Don’t panic—this is totally normal. Here’s how you can repair any damage and get your walls looking smooth and beautiful again:
Filling Nail Holes
Use spackling compound to fill in any nail holes or dents in the drywall. Let it dry completely, then sand it smooth with fine-grit sandpaper. Once the surface is smooth, you can prime and paint it to match the rest of your walls.
Reattaching Baseboards
If you were able to save your baseboards, now’s the time to reattach them. Use finishing nails and a nail gun to secure them to the wall. Fill in any nail holes with wood putty, then sand and paint them to match your new wall color.
And just like that, your walls will look brand new!
Alternatives to Removing Paneling
Not everyone wants to go through the hassle of removing paneling. If you’re looking for an easier solution, there are a few alternatives you can consider:
Painting Over Paneling
One option is to paint over the paneling instead of removing it. This can give it a fresh new look without all the hard work. Just make sure to clean the panels thoroughly and use a primer designed for glossy surfaces before applying paint.
Adding a New Layer
Another option is to add a new layer of drywall or paneling over the existing one. This can create a smooth, modern look without having to deal with the old paneling underneath.
Both of these methods can save you time and effort, but they might not be the best choice if you’re dealing with water damage or other issues behind the paneling.
Cost Considerations
Let’s talk about the elephant in the room—cost. How much is this project going to set you back? The good news is, removing paneling is relatively inexpensive if you do it yourself. The main costs will be tools, materials for repairs, and possibly hiring a professional for electrical or plumbing work.
Here’s a rough estimate of what you might spend:
- Tools: $20-$50 (if you don’t already own them)
- Materials for repairs: $50-$100
- Professional services: $200-$500 (depending on the scope of work)
Of course, prices can vary depending on where you live and the condition of your walls. But overall, this is a pretty budget-friendly project.
Tips for Beginners
If this is your first time tackling a project like this, don’t worry—we’ve got some tips to help you out:
- Start small: Begin with one wall to get the hang of it before moving on to the rest.
- Take breaks: Removing paneling can be physically demanding, so don’t try to do it all in one day.
- Ask for help: Enlist a friend or family member to lend a hand—it’ll go faster and be more fun!
And most importantly, have fun with it! DIY projects are a great way to learn new skills and transform your space.
Final Thoughts
There you have it, folks—everything you need to know about how to take down paneling. Whether you’re looking to update your home’s decor or uncover hidden treasures behind those walls, this project is definitely worth the effort. Just remember to plan ahead, use the right tools, and take your time.
Now it’s your turn! Have you ever removed paneling before? What was your biggest challenge? Share your experiences in the comments below, and don’t forget to check out our other DIY guides for more inspiration. Happy renovating, and good luck with your project!